|
|||||||
| Home | Forum | Online Store | Information | LJ Webcam | Gallery | Register | FAQ | Community | Calendar | Today's Posts | Search |
 |
|
|
Thread Tools | Display Modes |
 06-04-2014, 10:53 PM
|
#1 |
|
Member
Join Date: Apr 2006
Location: SoCal
Posts: 78
|
Viking Kayaks Profish Reload Review and Modifications
Last edited by spudz; 02-24-2015 at 06:56 AM. |

|

|
|
06-04-2014, 11:12 PM
|
#2 |
|
WildernessWanker
Join Date: Mar 2013
Location: Lancaster, CA
Posts: 345
|
I've read nothing but awesome reviews about it, unfortunately I haven't been able to find one down here to demo or look over. Keep me posted on the review please.
Sent from my SPH-L520 using Tapatalk |
|
|
|
|
06-22-2014, 11:09 AM
|
#3 |
|
Member
Join Date: Apr 2006
Location: SoCal
Posts: 78
|
I haven't had any experience with the Viking kayaks, yet I've seen them on the internet. I didn't think they were available here in the states. When I saw one was available I decided to go for it. This is my first review and I hope it'll be helpful.
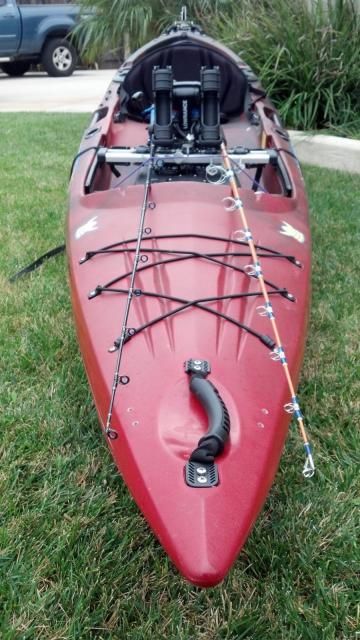
The Basics: The Viking Profish Reload is 14' 9" long, 29 1/2" wide and empty weighs in at 65 pounds (sorry John, I was off by 10 pounds) The Tackle Pod comes standard. The following items did not come standard with the Viking: seat, Chill Pod and Kid Pod/Flat Deck. Additionally, this Viking had 4 flush mount rod holders and rudder installed. The Chill Pod weighs in at 11 pounds and is secured in the tank well area. The Tackle Pod is roughly 2' 4" x 11" and weighs in at 8 pounds. The Kid Pod/Flat Deck is roughly 2' 6" x 11" and weighs in at 6 pounds. Took the Viking on her maiden voyage to Leo Carrillo Beach on Friday morning. Mild surf conditions, smooth launch and easily punched through the surf as I headed out to meet John and Pete.  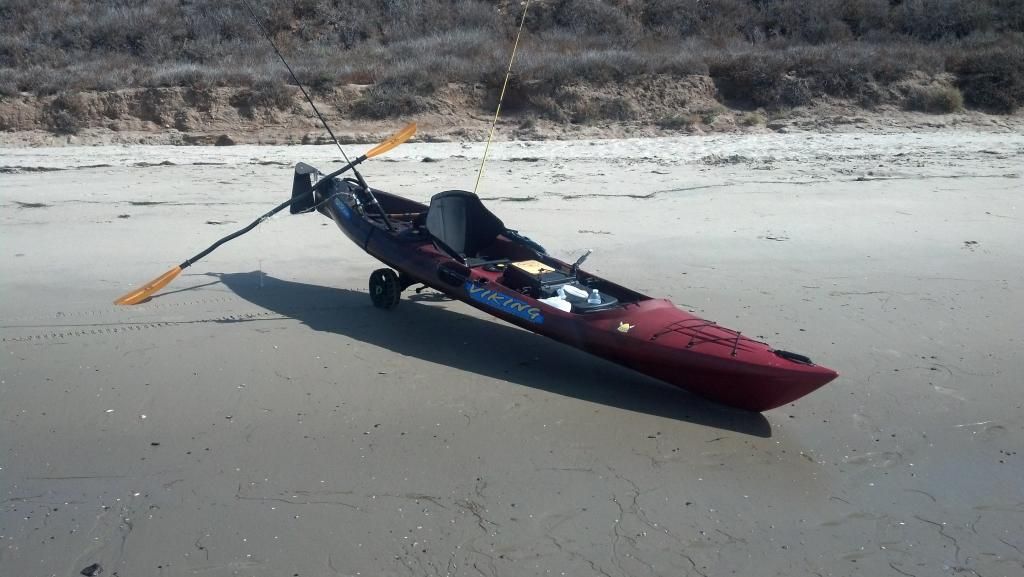 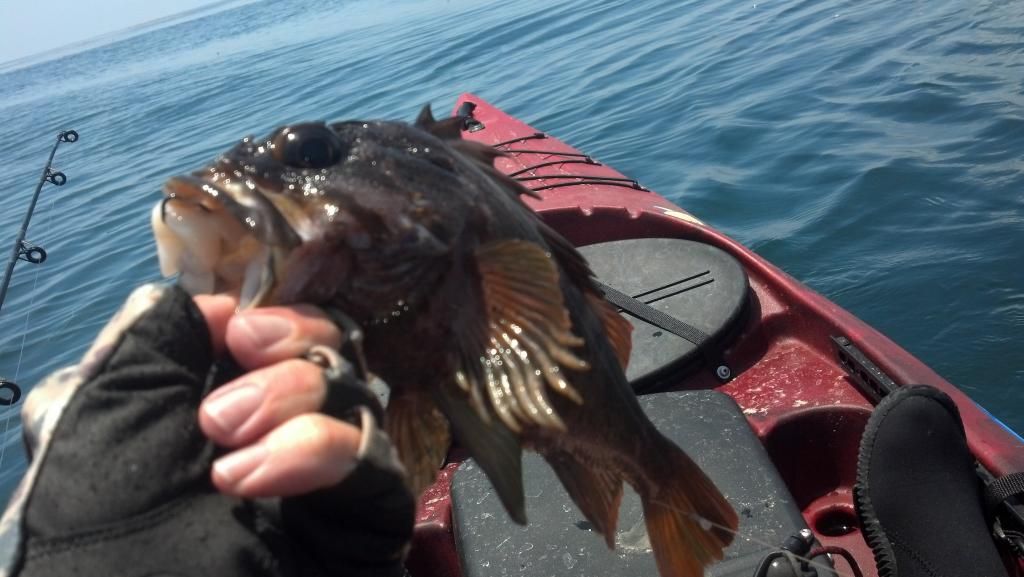 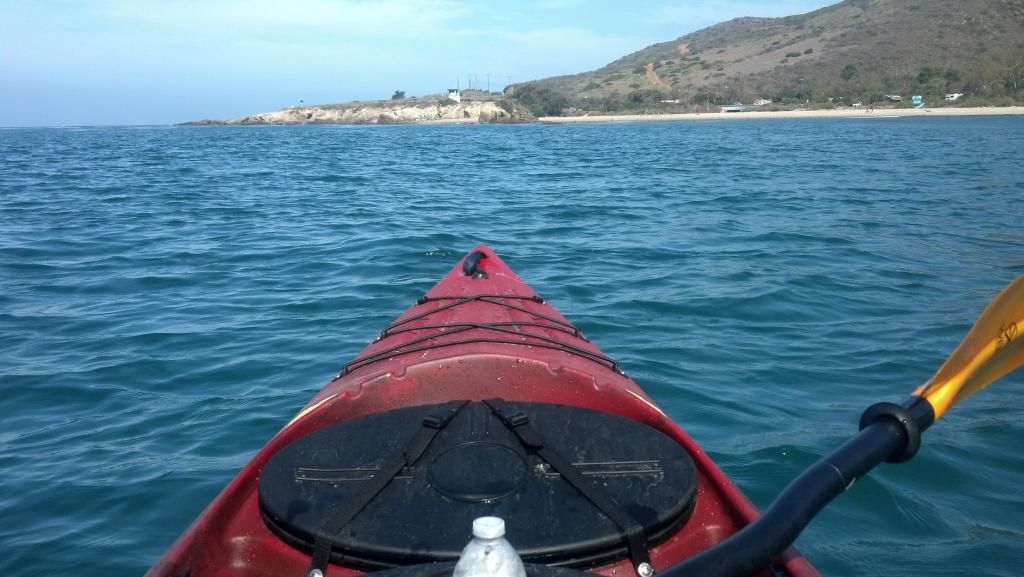 Very fast and stable. I was surprised how effortless it was to pick up speed and coast with each stroke. Great primary and secondary stability - similar to what I experienced with the Ocean Kayak Trident 13. The rudder is made of a type of polycarbonate. No flex and strong. It is wider than most blades seen on most kayaks and it hovers slightly above the keel line. Which means less contact with the water and slightly less responsive as other rudder systems found on most kayaks. But still adequate - it got the job done. The rudder is set in the downward/deployed position. There is no means to deploy/retract the rudder as seen in other rudder systems. A length of bungee keeps the rudder in the downward/deployed position. Yet, allows for limited retraction to prevent snags. I paddled through some thick kelp throughout the day and didn't get snagged once. The only trouble I had with the rudder was due to me not tightening up a bolt which resulted in the rudder sticking a few times. 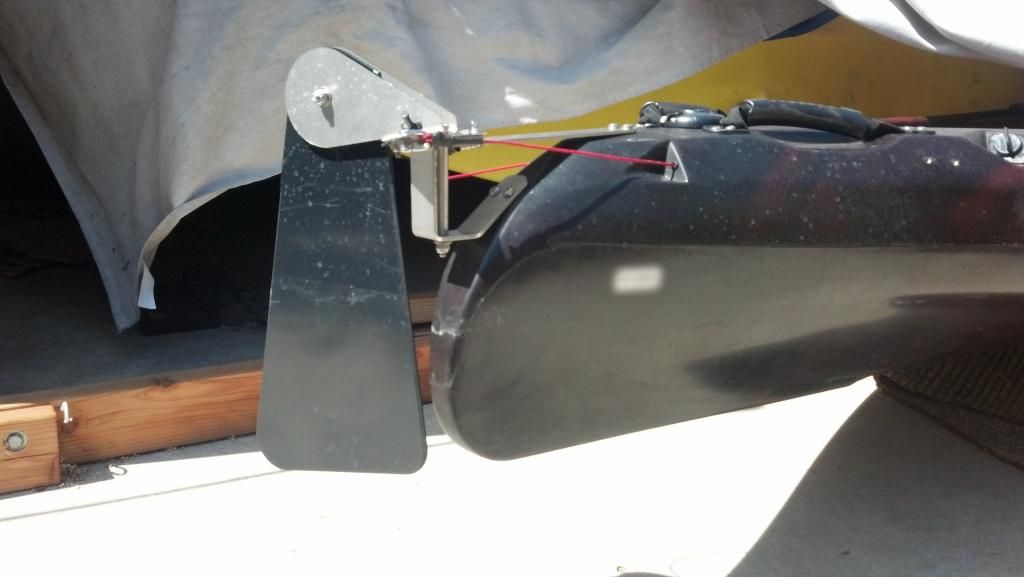 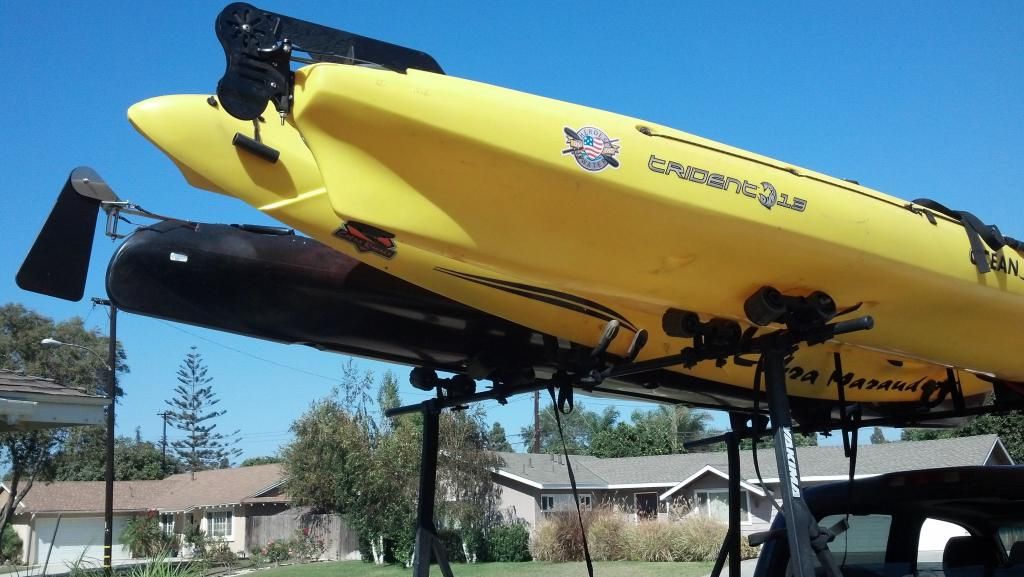 I love the Tackle Pod and Kid Pod/Flat Deck! These are interchangeable systems that do not provide access to the hull, yet has ample space for gear storage. 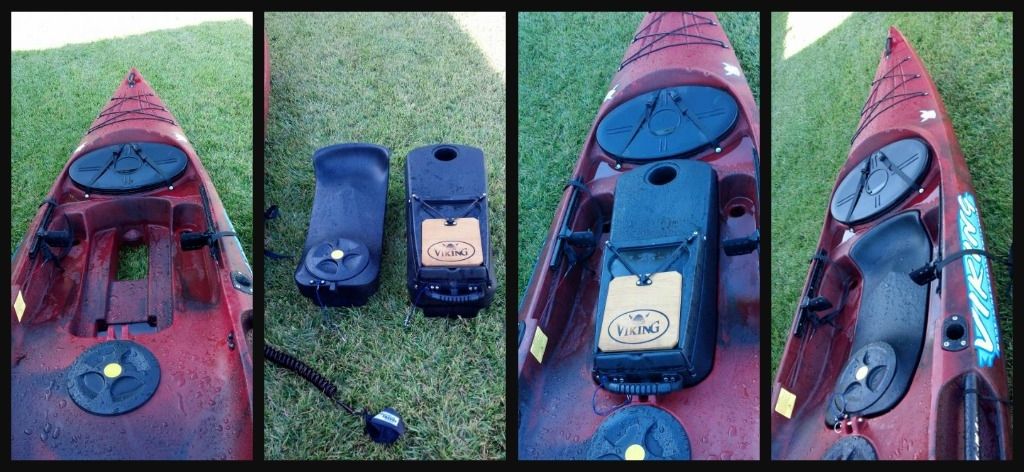 The Tackle Pod is roughly 2' 4" x 11". It comes with a small cutting board on top and a cup holder. A flip up door secured by a bungee provides easy access into the pod. It is reasonably water tight. Tackle storage, lunch, small dry bags, etc. This pod is made with fish finder mounting in mind. A place to secure a battery or two and an area to install a transducer at the bottom of the pod that comes into direct contact with the water. The Tackle Pod can be easily removed and swapped out with the Kid Pod/Flat Deck. This measures roughly at 2' 6" x 11". It has a hatch lid that allows for storage of a few items within it. The Kid Pod/Flat Deck clears up the deck. But, my 3 and 7 year old daughters love having a place to sit (not both at the same time) while paddling around the Channel Islands and Ventura Harbors. There are three small bucket hatches that have drain plugs in them. They do not provide access into the hull. Not sure how useful these will be, perhaps a live well? Regardless, they are a pain to open/close - especially with wet hands! The bow hatch is easily accessible and is water tight. It allows for storage into the hull - I've stored my wheels, dry bags and a spare paddle (broken down 2 piece) here. But don't expect to store your rods here - too tight and not enough space for them. 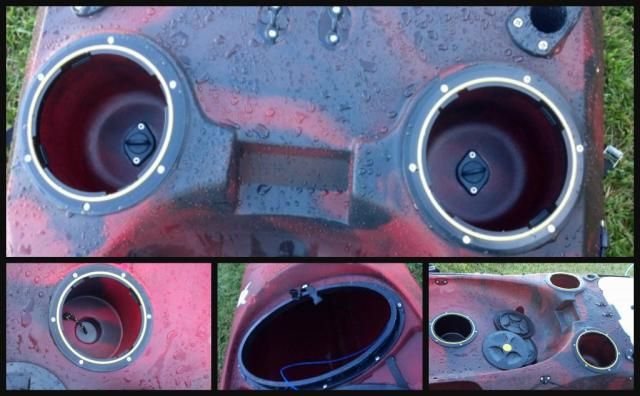 The tank well is LARGE and can store quit a bit of gear. The Chill Pod is an 11 pound storage pod designed to be placed here. It has a unique hatch which is easily managed. It was designed to be a cooler for fish (or beverages  ). As a storage system for gear - It may be impractical. Gear is typically difficult to retrieve while on the water- due to the gear sliding everywhere and may be difficult to reach. The tank well provides enough space for a milk crate and more. But, not enough eyelets and no bungee in this area to secure your gear. Would have to customize it further yourself to make the tank well efficient and useful. ). As a storage system for gear - It may be impractical. Gear is typically difficult to retrieve while on the water- due to the gear sliding everywhere and may be difficult to reach. The tank well provides enough space for a milk crate and more. But, not enough eyelets and no bungee in this area to secure your gear. Would have to customize it further yourself to make the tank well efficient and useful.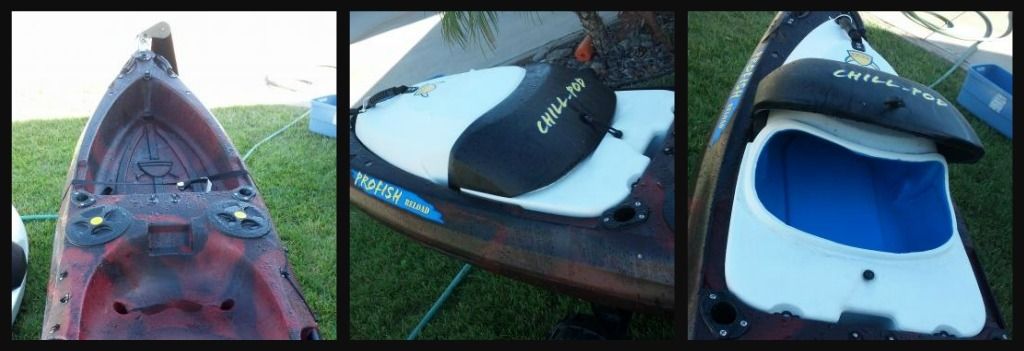 Although the surf was mild, I would expect this kayak would have no problem punching through waves/the surf zone on more challenging launches. This kayak is fast, accelerated easily, tracked well and experienced good primary and secondary stability. The rudder system is adequate - although you cannot retract the rudder to maintain a fixed/static upright position, I was pleased I could zip through the kelp all day without a snag. The Tackle Pod is easily removable and great for storing tackle boxes and other gear. I really like how I can rig the fish finder, battery and transducer to the Tackle Pod. I wish there was enough room for storage of rods in the hull - Thus breakdown of the rods/reels upon launch/landings is necessary. Scalloped deck above the bow hatch + bungee on the Tackle Pod lid is used to secure the rods on the deck. 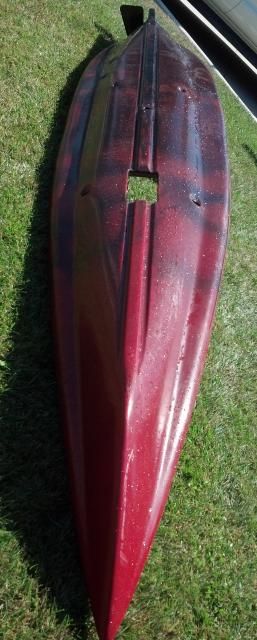 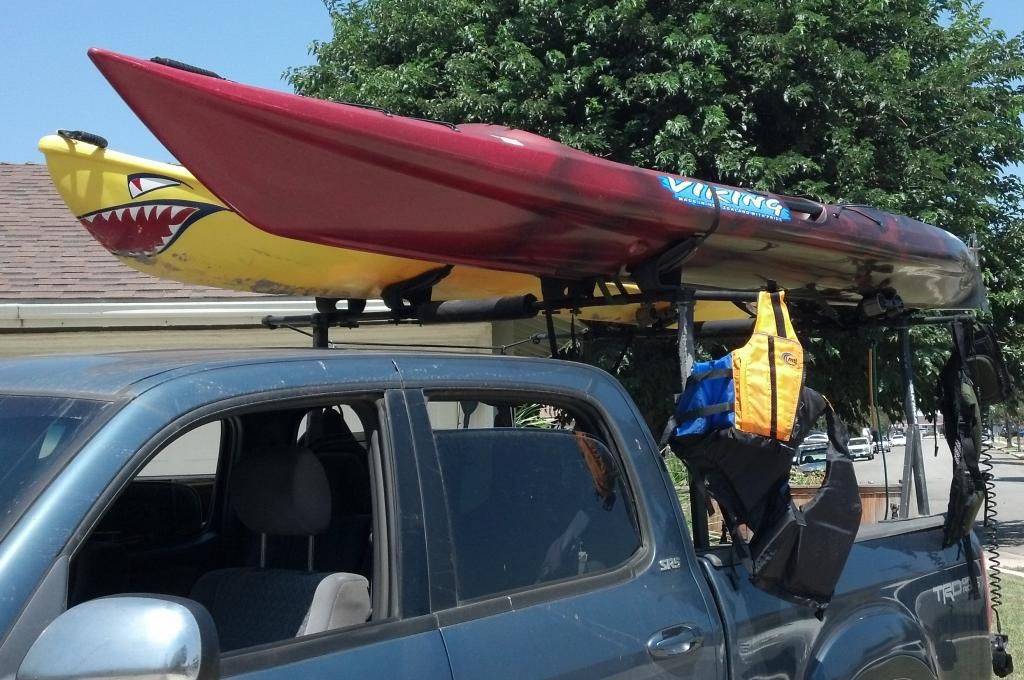 What's next for her? I'll be installing a fish finder and a few gear tracs soon. Again, this is my first review and I hope it was helpful. Last edited by spudz; 09-14-2014 at 02:38 PM. |
|
|
|
|
06-23-2014, 11:55 AM
|
#4 |
|
Member

Join Date: Mar 2005
Posts: 66
|
Great detailed and comprehensive review, Eddie. That does look like a sleek kayak.
Nice fishing with you and Pete on Friday. The surf and wind conditions were perfect until about noon. Too bad the live bait didn't produce, but the rock fish were biting the plastics! |
|
|
|
|
06-24-2014, 10:55 PM
|
#5 |
|
Member
Join Date: Apr 2006
Location: SoCal
Posts: 78
|
Wildernesswanker,
Just let me know when you're headed this way for some fishing, you're welcome to try her out for a paddle! Last edited by spudz; 06-24-2014 at 11:25 PM. |
|
|
|
|
06-24-2014, 11:22 PM
|
#6 |
|
Member
Join Date: Apr 2006
Location: SoCal
Posts: 78
|
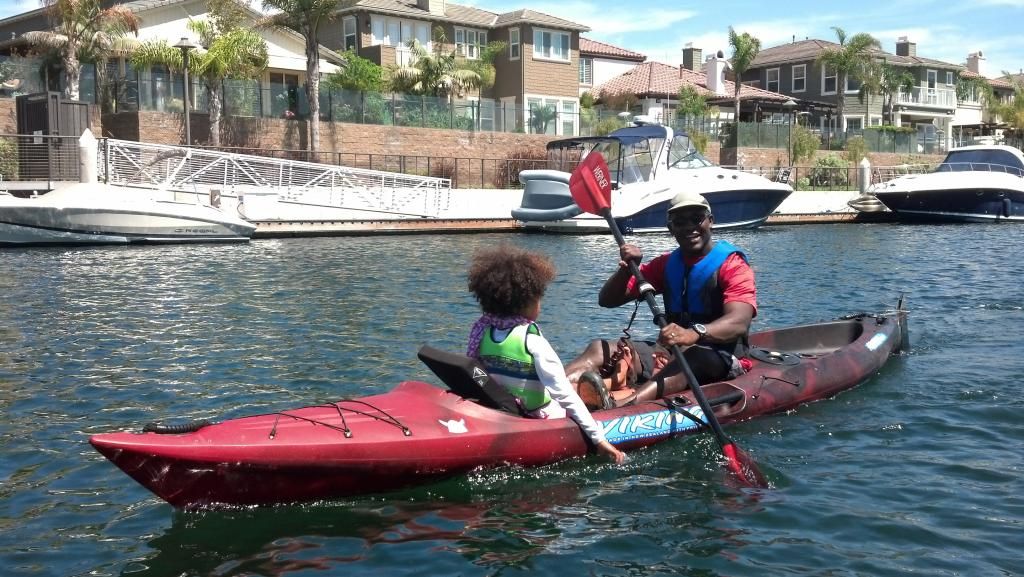
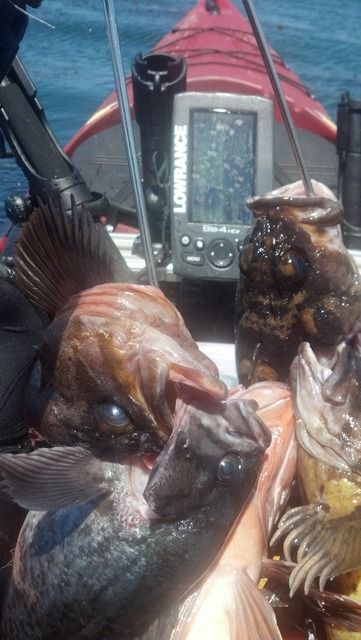
John,
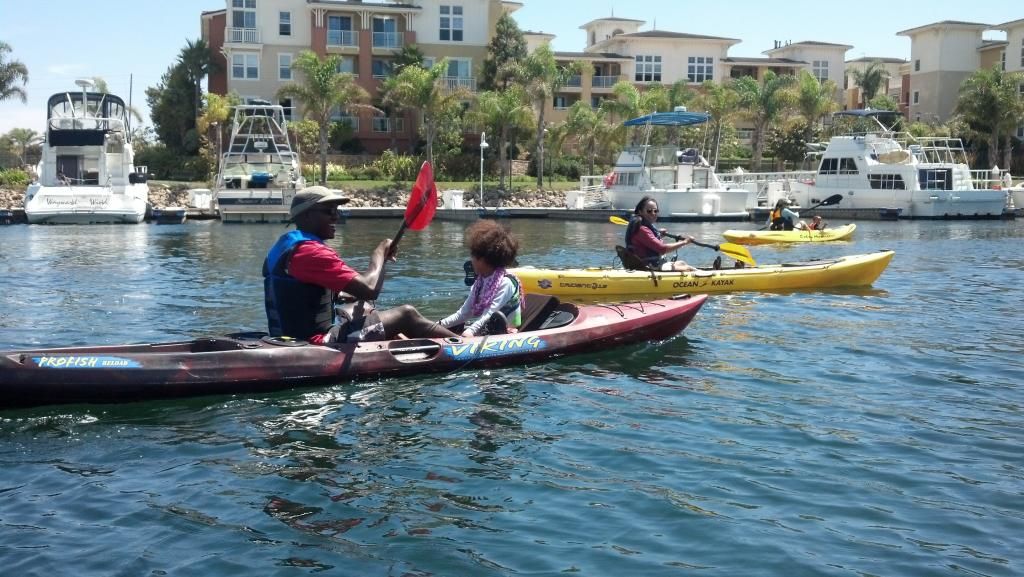
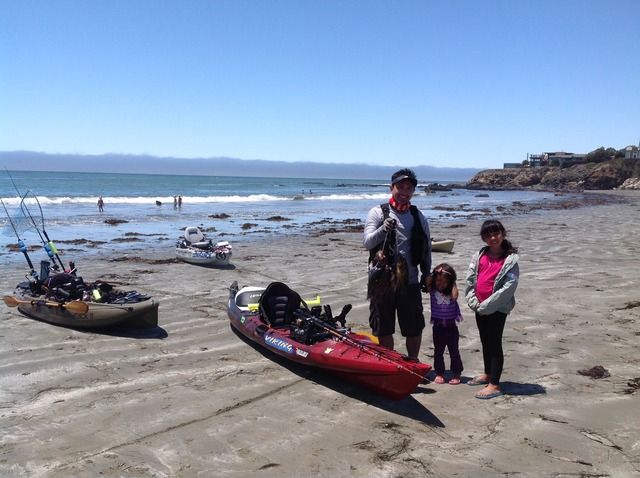
Thanks for the compliment, Hope you enjoyed the review. It was nice fishing with you and Pete. I don't get to make it out as often as I'd like. But thanks for keeping me in mind. It was a nice day to be on the water. Here's a good pic, enjoy! 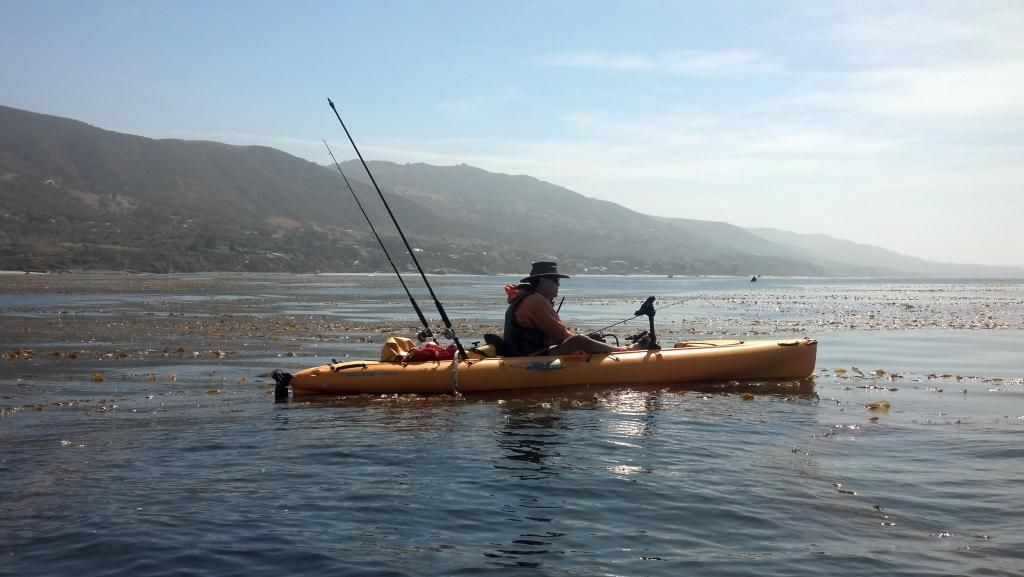
Last edited by spudz; 06-24-2014 at 11:28 PM. |
|
|
|
|
09-04-2014, 01:29 PM
|
#7 |
|
Member
Join Date: Apr 2006
Location: SoCal
Posts: 78
|
Labor day paddling with friends and family
Last edited by spudz; 09-05-2014 at 11:54 PM. |
|
|
|
|
02-24-2015, 12:37 AM
|
#8 |
|
Member
Join Date: Apr 2006
Location: SoCal
Posts: 78
|
Decided it was time to make a few modifications to have it fit my needs. Whether it gives you a few ideas or assists with a modification I hope it’s helpful.
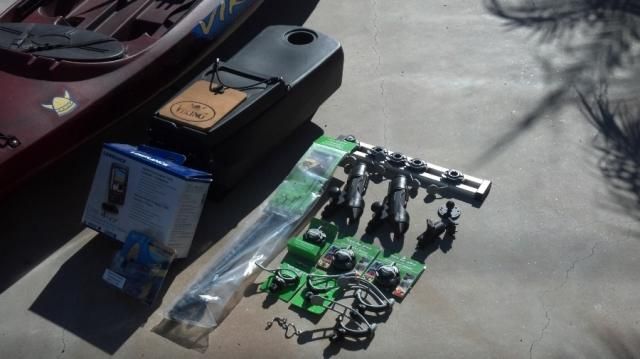 Started out with a few items in the modification of the tackle pod. However, by the time all was said and done... the few items grew beyond the items displayed in this pic. 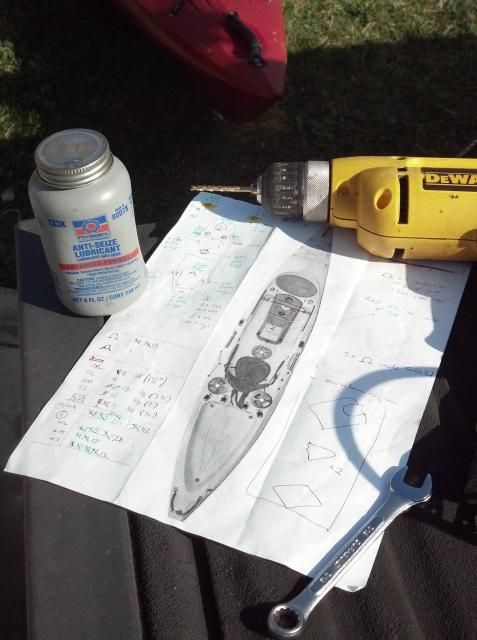 Here's my plan. Viewing how others had modified their Tackle Pod and choosing what I'd like to have on mine - I put it on paper, including an inventory of the necessary hardware. While seated in the kayak, I performed a dry mock up of the Tackle Pod w/ the desired modifications - this step allowed me to determine placement of modifications, ergonomics and whether or not a particular modification was practical and/or possible. What worked for one paddler may or may not work for another due to variables such as paddler's height, arm length, stroke length, etc. 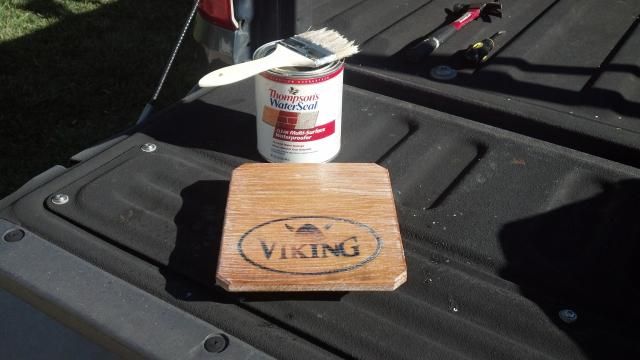 One of the first modifications completed was applying a water seal to the wooden cutting board - took a couple of weeks for this to cure. Transducer placement/installation was completed easily and quickly with the Viking Kayaks Transducer Installation Kit. Bottom view of the Tackle Pod with the Lowrance transducer mounted. The transducer comes into direct contact w/ the water. It is housed far enough into the Tackle Pod and kayak that it is protected/will not encounter any snags nor hangups w/ kelp or rocks. Top view of the Tackle Pod with the transducer mounted to the underside. Next step is to coil the cable into the cup holder and then secure the cap/cover with several self tapping screws. 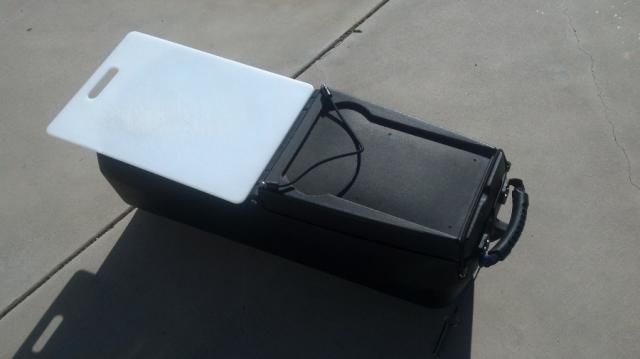 I've had screws/bolts/rivets pop out, especially in high stress areas of other kayaks I've owned. I decided to add a backing board to reinforce the modifications made since I'll be securing so much to the small topside of the Tackle Pod. I used a polypropylene/plastic cutting board as my backing board. 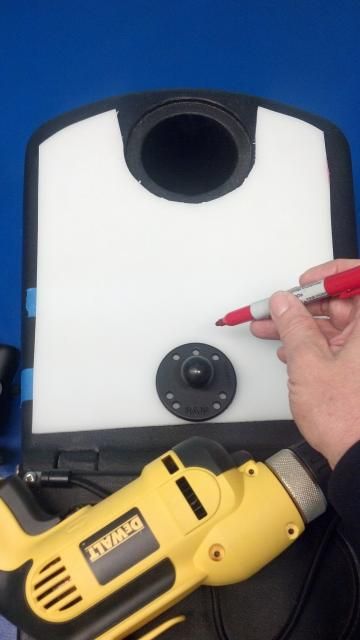 After templating, cutting and fitting the polypropylene/plastic cutting board to the inside of the Tackle Pod. I then placed it on the topside of the Tackle Pod (using the RAM Round Base with 1.0 Inch Ball) to determine where the first holes are to be drilled. The RAM base will secure the Lowrance display unit. 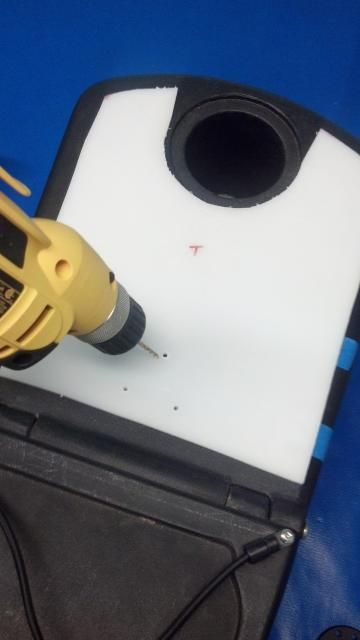 Drill bit should be a size smaller than the screw. This will insure a greater water tight fit. Stabilizing the polypropylene/plastic cutting board to the Tackle Pod, drill the first predetermined hole all the way through both the cutting board and Tackle Pod. Place screw through both the cutting board and Tackle Pod. This step repeated until all thee holes had been completed. 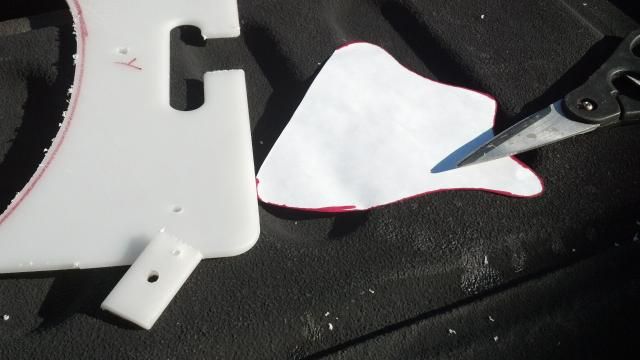 Paper stencil for creation of two more backing boards made from a polypropylene/plastic cutting board. This backing board will reinforce a Railblaza Starport and a pad eye near the large front hatch of the kayak. 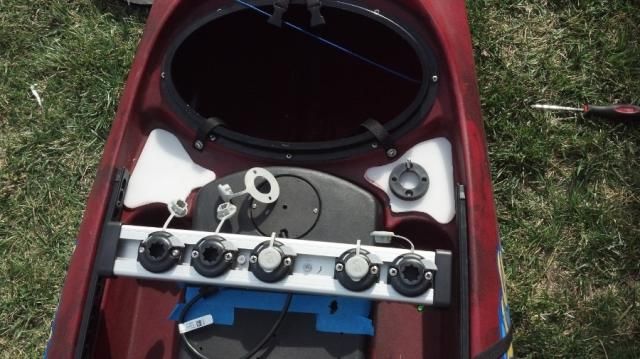 Same steps as the drill/hole placement of the backing board to the Tackle Pod - Drill bit should be a size smaller than the screw. Situate the backing board accordingly on the topside, then stabilize the polypropylene/plastic cutting board to the Viking Kayaks kayak, drill the first predetermined hole all the way through both the cutting board and kayak. Place screw through both the cutting board and kayak. This step repeated for the second hole to secure the Railblaza starport. Next determine the location of the pad eye, mark the hole w/ a sharpie, drill through both cutting board and kayak, place screw, and repeat for the last screw. Once this is done, remove cutting board from the topside of the kayak and place into hull to secure the starport and pad eye accordingly. If the screw can easily slip through the drilled holes of the kayak (holes are too big) then you'll want to dab the holes with a marine/water sealant (marine goop or 3M 5200 Marine Sealant) to prevent water from leaking into the hull. 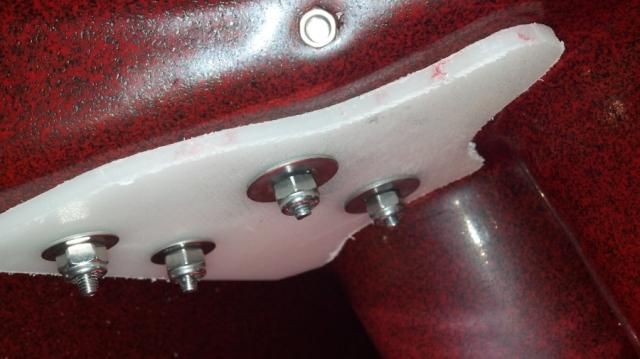 Inside the hull view of the backing board and hardware securing the starport and pad eye to the kayak. - I used a light application of an anti seize lubricant on all the screws in this project. The anti-seize is used to prevent corrosion, seizing, and stripping of screws/bolts during disassembly and reassembly. 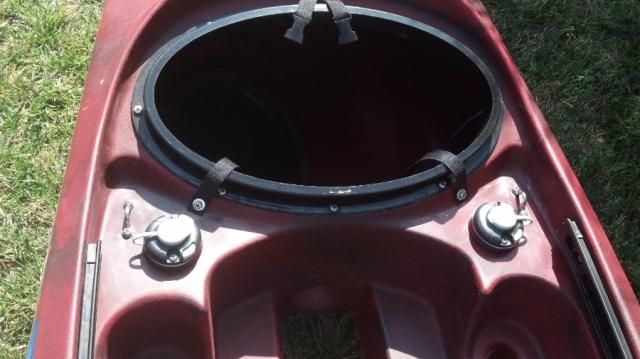 Starports and pad eyes completed. Will post more pics this week... Last edited by spudz; 06-24-2015 at 12:17 AM. |
|
|
|
|
02-24-2015, 02:01 PM
|
#9 |
|
Here fishy fishy fishy...

Join Date: May 2011
Location: San Diego, CA
Posts: 774
|

|
|
|
|
|
02-24-2015, 10:27 PM
|
#10 |
|
Member
Join Date: Apr 2006
Location: SoCal
Posts: 78
|

|
|
|
|
|
02-24-2015, 10:32 PM
|
#11 |
|
Member
Join Date: Apr 2006
Location: SoCal
Posts: 78
|
 The Tackle Pod in the "Prep" stage of the modification. At this point most of the necessary holes had been drilled. 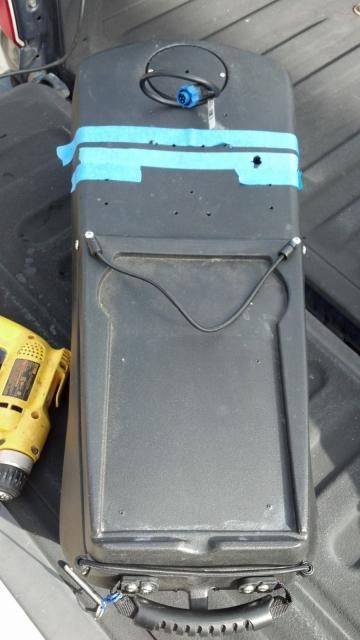 Top view of the Tackle Pod in the "Prep" stage. The holes for the modified wooden cutting board will be drilled next. 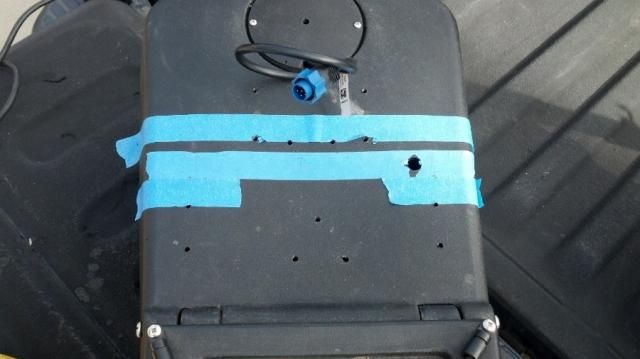
|
|
|
|
|
02-25-2015, 10:46 PM
|
#12 |
|
Member
Join Date: Apr 2006
Location: SoCal
Posts: 78
|
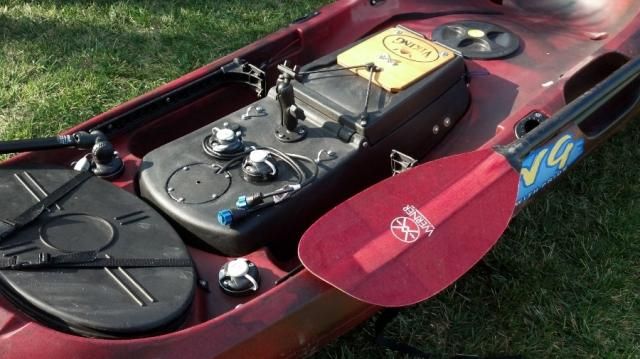
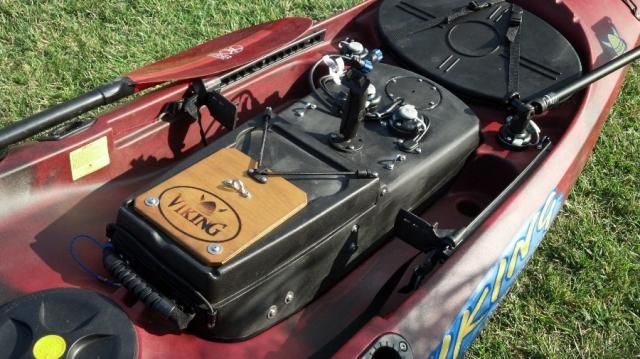
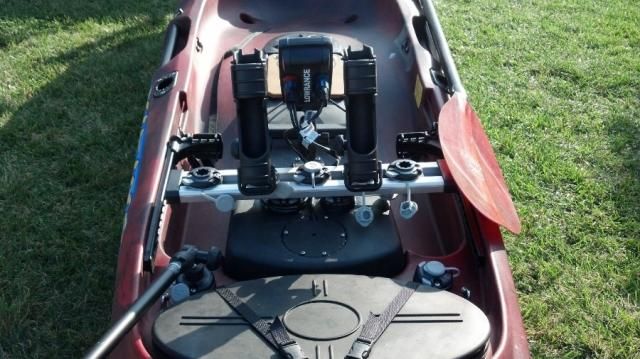
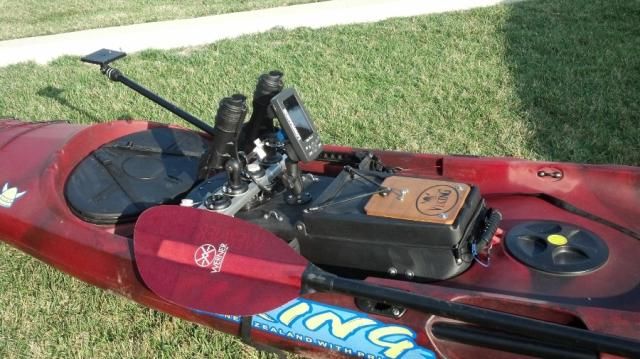
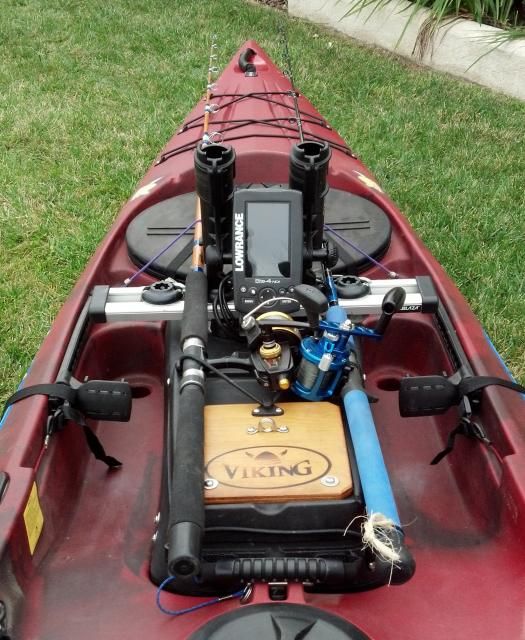
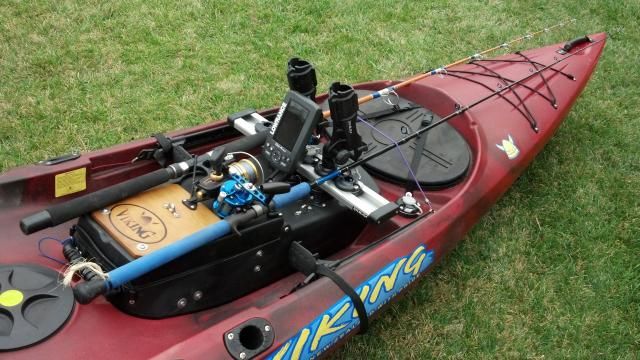
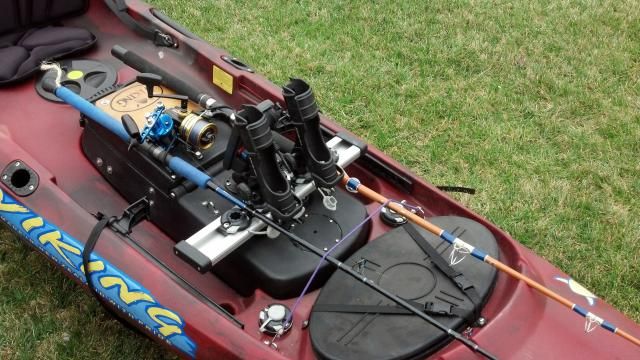
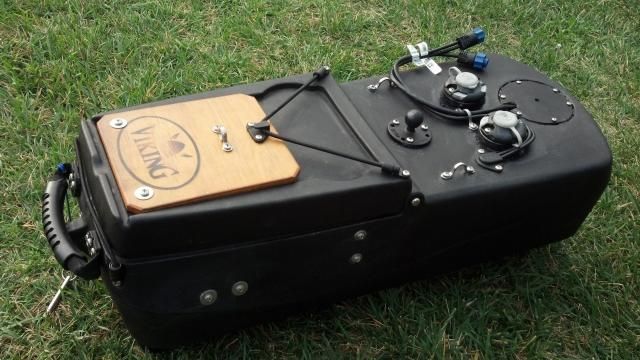 Modified Tackle Pod - 2- Railblaza Starports 4 - Pad eyes on exterior 6 - Pad eyes on interior 1 - RAM round 1" ball mount 1 - Viking Kayaks Fish Finder DIY install kit 2 - Polypropylene/plastic cutting boards cut to fit and used as backing boards 1 - Water seal the wooden Viking cutting board 1 - Installed Lowrance transducer + power cable  Modifications for the lid of the Tackle Pod - A polypropylene/plastic cutting board used as a backing board on the interior portion of the lid to reinforce the wooden cutting board on the exterior of the lid. Added a pad eye to the interior of the lid so I could clip items such as a small dry bag, sheath, etc for quick access. 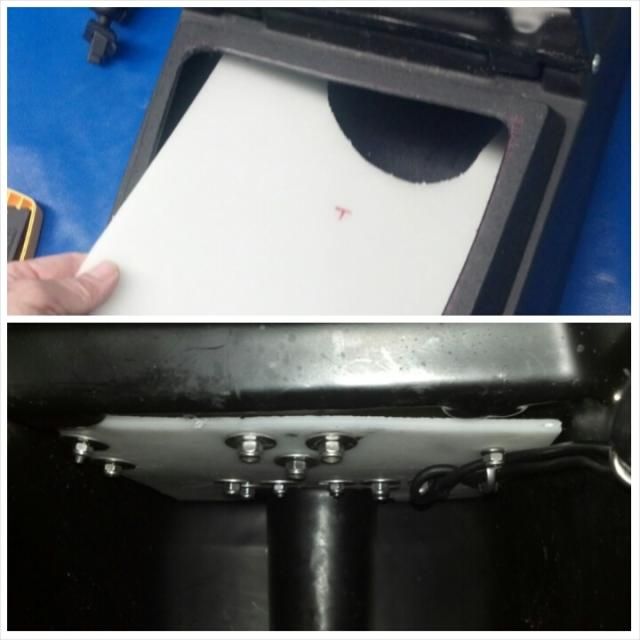 Interior of the Tackle Pod - Top photo: The polypropylene/plastic cutting board used as a backing board for the primary modified surface of the Tackle Pod. Bottom photo: The backing board after the Railblaza starports, pad eyes and RAM ball mount had been secured to the Tackle Pod. Power cable to the Lowrance running through 3 interior mounted pad eyes. 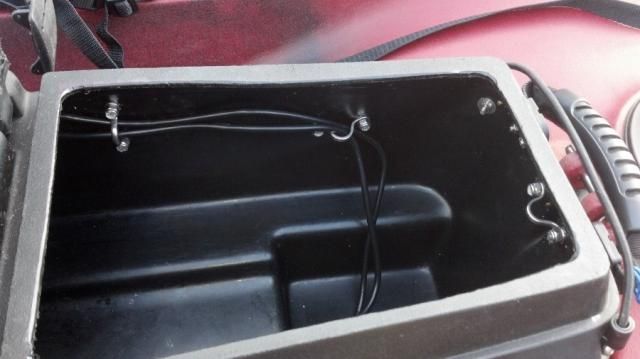 Interior of Tackle Pod. Last edited by spudz; 06-24-2015 at 12:21 AM. |
|
|
|
|
02-26-2015, 12:02 AM
|
#13 |
|
Member
Join Date: Apr 2006
Location: SoCal
Posts: 78
|
        Well, that's it for now. I hope this compilation of photos and descriptions of how I customized my Viking was helpful! Tight lines! Last edited by spudz; 06-22-2015 at 12:01 AM. |
|
|
|
|
04-21-2015, 03:42 PM
|
#14 |
|
Member
Join Date: Apr 2006
Location: SoCal
Posts: 78
|
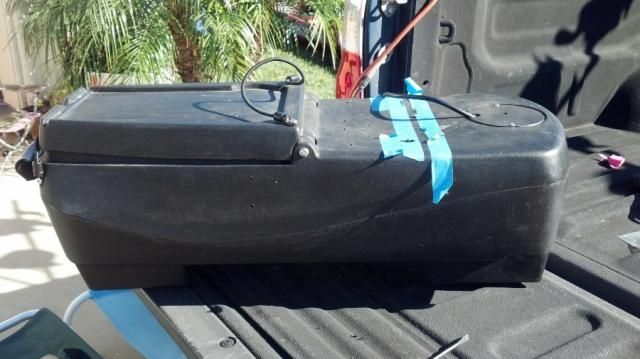
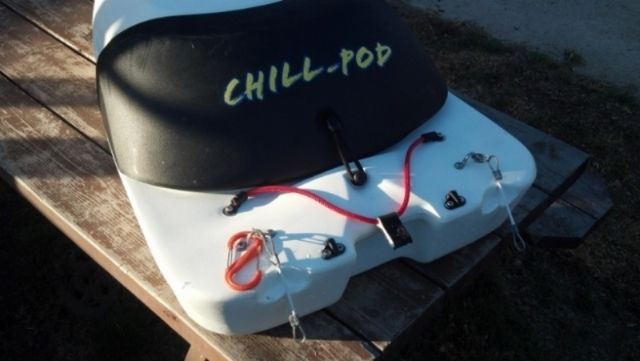
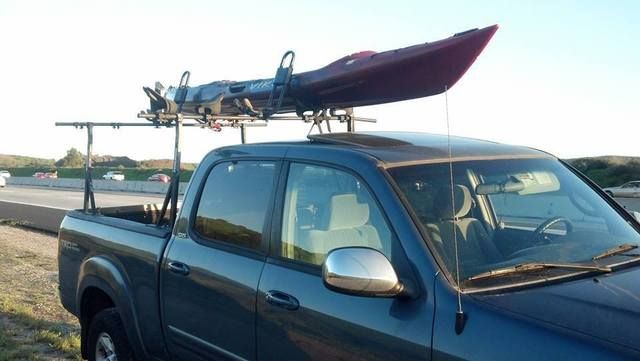 I’d like to thank Dan for the chill pod! Really appreciate the exchange my friend. Lost my original Chill Pod driving down the freeway. Securing your Chill Pod properly (under pad eyes towards the front and securing the rearward strap) WAS INSUFFICIENT for truck rack transportation and surf launches/landings. Here’s how I modified the Chill Pod so I won’t lose it on the road or in the surf. Thanks to Arnie Mears and Moose Gibson for your input. Hope this is helpful! 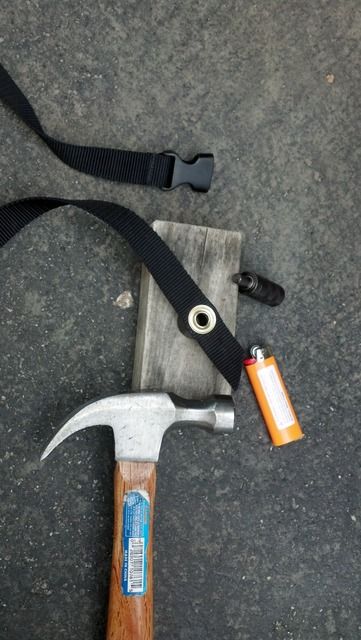 Made my own straps with plastic snap buckles and grommets placed w/ a grommet kit. 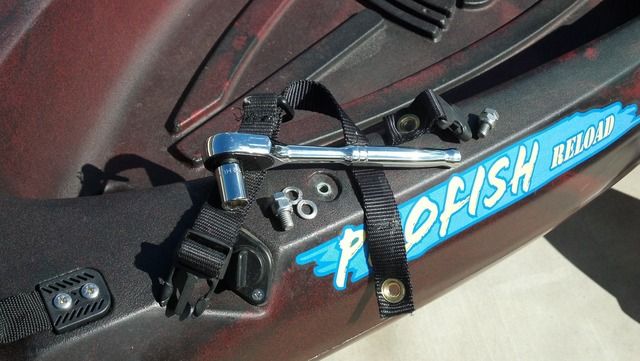 Followed Arnie's suggestion of a strap through the handle of the Chill Pod. The two-piece strap is bolted/secured into the brass inserts towards the rear of the tank well (one on each side). 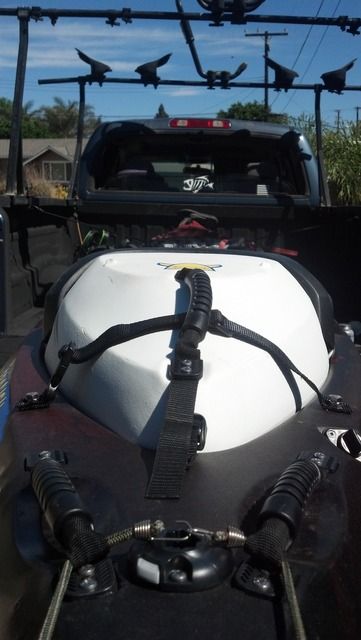 The plastic buckle allows you to easily secure the strap to the pod. 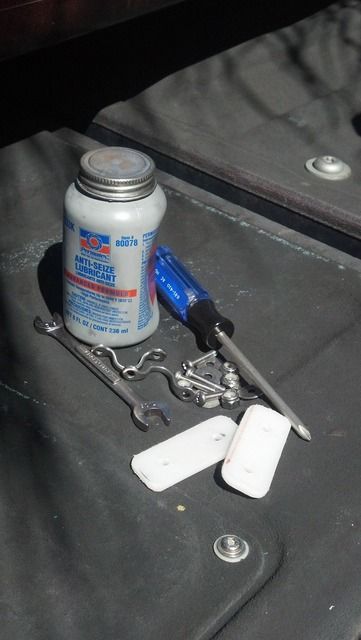 Hardware for the Chill Pod - Two pad eyes w/ stainless screws, washers and nylock nuts. Small plastic cutting board pieces for backing/additional security and anti-seize. 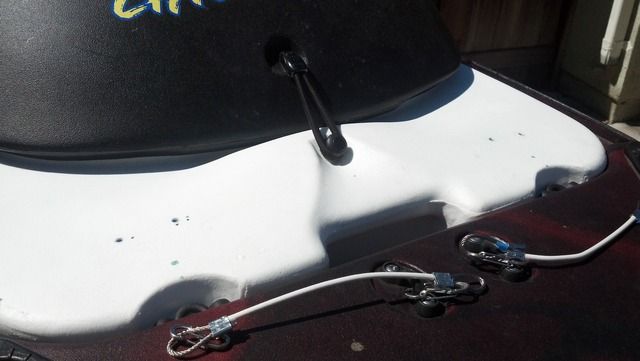 Holes (slightly smaller than the diameter of the screw for water tight fit) drilled into the Chill Pod (+ small plastic cutting board pieces/backing plate w/ larger holes drilled through - not shown in this pic - see previous pic) as a backing plate for the pad eyes. Tethers made of vinyl covered stainless with S-Biners at each end. 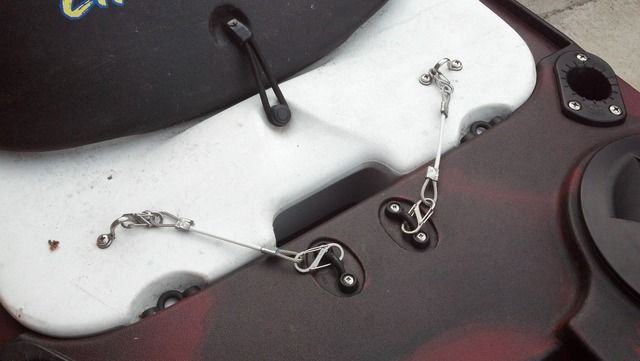 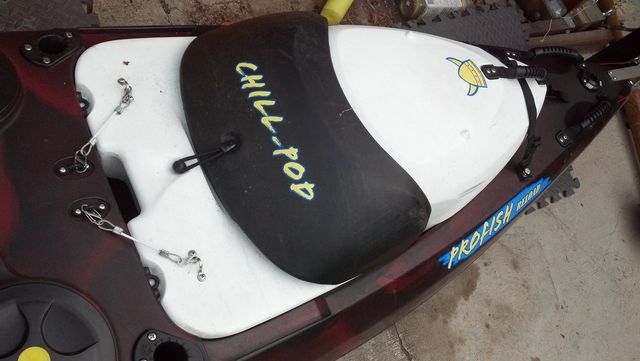 Secured and ready to hit the road and surf! Last edited by spudz; 06-19-2015 at 12:03 AM. |
|
|
|
|
06-20-2015, 07:45 AM
|
#15 |
|
Member
Join Date: Apr 2006
Location: SoCal
Posts: 78
|
A few more modifications to the Chill Pod -
 Wanted to secure the "Hawg Trough" measuring device so I wouldn't lose it in the surf or while paddling. The trough is too long to secure in the chill pod or the tackle pod. Also wanted it to be accessible. Here's my solution - shock cord and a couple bungee lashing hooks. 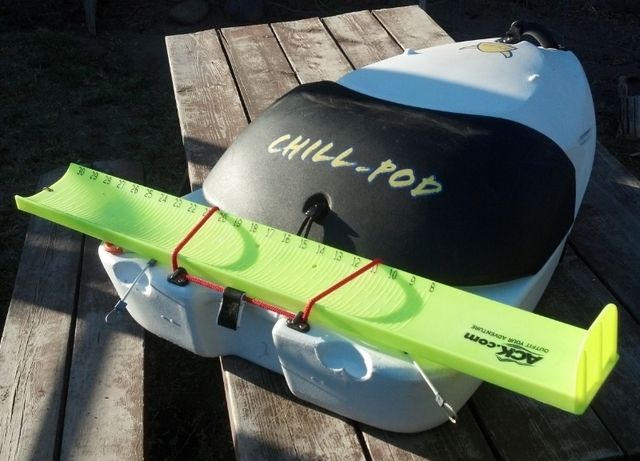 Good to go! Last edited by spudz; 06-21-2015 at 08:51 AM. |
|
|
|
|
06-20-2015, 01:05 PM
|
#16 |
|
Junior
Join Date: Apr 2015
Posts: 8
|
Looks like you are getting all set up. I'm moving down there in August with a profish reload that has yet to hit water. I got and then promptly broke my leg. Hope to see you out and about and see the mods in person. Mine is still stock.
|
|
|
|
|
06-21-2015, 09:02 AM
|
#17 |
|
Member
Join Date: Apr 2006
Location: SoCal
Posts: 78
|
RussH, Sorry to hear about your broken leg. That'll keep you of the water for a while. Where are you moving to/from? I would be happy to help out with your rigging. I usually fish Ventura and Santa Barbara Counties. Leo Carrillo is my usual goto.
|
|
|
|
|
06-21-2015, 01:19 PM
|
#18 |
|
Junior
Join Date: Apr 2015
Posts: 8
|
I'll have to try to make it happen spudz.
Moving from Salt Lake area to San Diego the first of August. My wife went to school in Santa Barbara and we have people up there so will be making some trips up there sometime and maybe something will work out. I'm a newby at fishing in the salt. I've done some kayaking and some fishing but haven't put em together much yet. Thanks Russ |
|
|
|
|
06-22-2015, 10:50 AM
|
#19 |
|
Member
Join Date: Apr 2006
Location: SoCal
Posts: 78
|
Russ,
Happy to help Just send me a message when you’re in the area and we’ll hit the water. Feel free to contact me about rigging questions too. |
|
|
|
|
06-25-2015, 11:33 AM
|
#20 |
|
Member
Join Date: Apr 2006
Location: SoCal
Posts: 78
|
|
|
|
|
|
|
|


 Linear Mode

