|
|||||||
| Home | Forum | Online Store | Information | LJ Webcam | Gallery | Register | FAQ | Community | Calendar | Today's Posts | Search |
 |
|
|
Thread Tools | Display Modes |
 05-14-2012, 09:57 PM
|
#1 |
|
Senior Member

Join Date: Sep 2005
Posts: 1,921
|
Mirage Drive Mayhem
I took a few pics on the way, probably not as many as I should have. I have rebuilt a mirage drive in the past, but not to this extent. Its really not hard at all, and the parts are readily available. As usual, I got mine from Andy @ OEX Sunset Beach I had a couple issues with my Mirage Drive. First, the pin on my pedal assembly had damaged the adjustment holes on my drum. This made it so I could not adjust them on the water. This happened on both drums. On long trips, I like to move the adjustment on my peddles, just to mix things up and make longer treks more comfortable. The damaged holes made them impossible to adjust. Here are a couple pics of the carnage 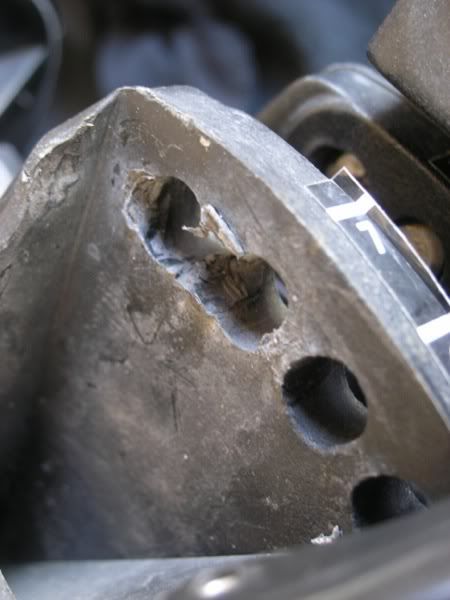 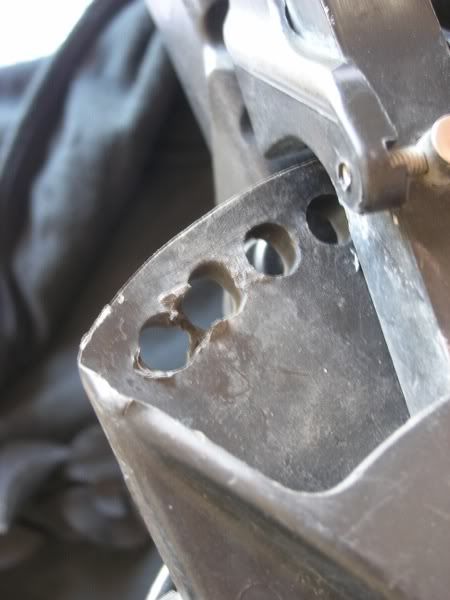 I had also stripped the threaded brass inserts in the sprocket which holds the fin mast in. This would cause the mast and fin to fall out sporadically while peddling. Certainly not ideal to lose a fin while chasing bird piles. This damage was my own fault, as I did not originally use Loctite to install- which Hobie recommends. Too many quick on the water repairs has caused undue wear to the brass inserts. Here is a pic 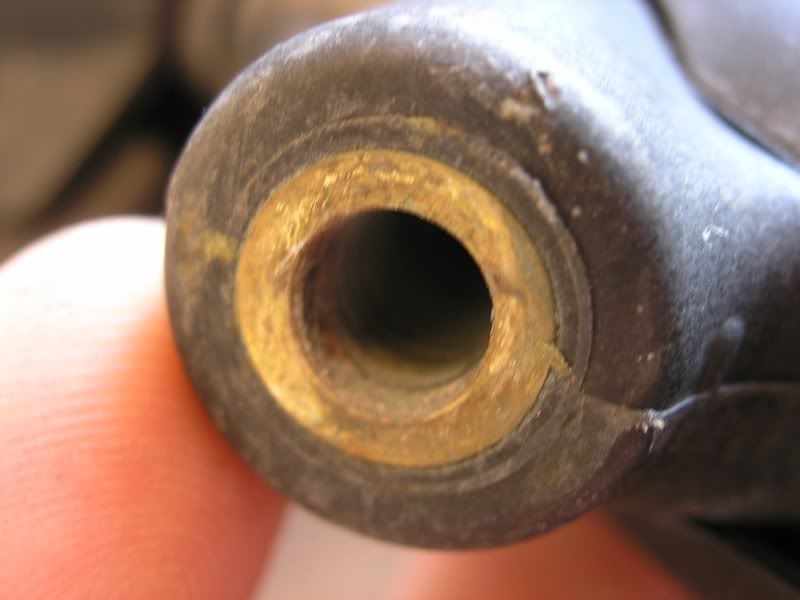 To change out 2 drums and 2 sprockets, you need just a few tools. A couple wrenches, and alan wrench, and a pair of pliers were all I used today. First, take out the bolt that is holding the Pedal in 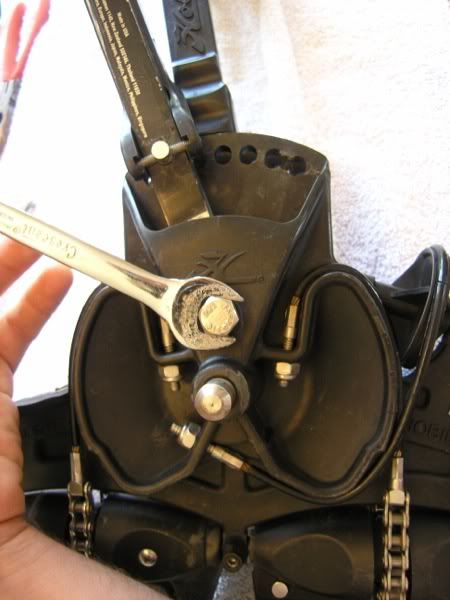 Next, take out all the old built-up WSB scales and sand that were buried in the crevices. This step may vary by user, depending on how you use your Hobie  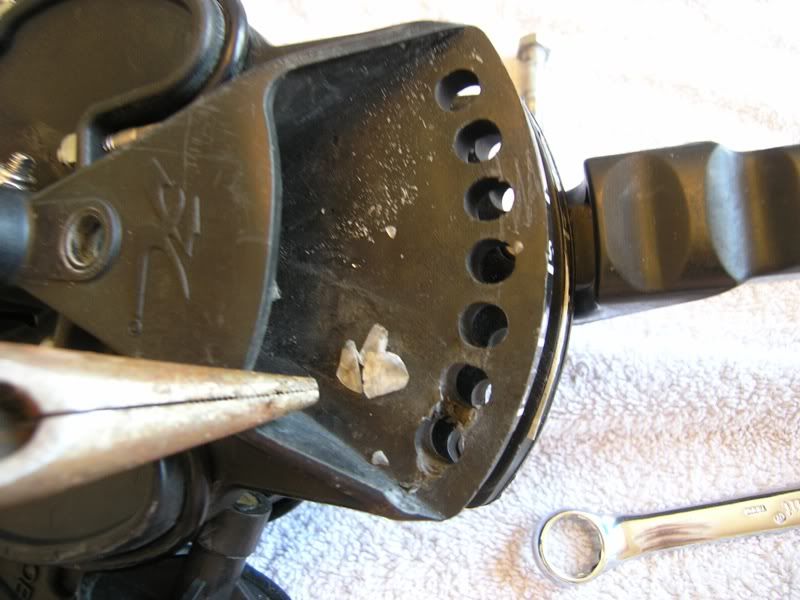 Next, take off the nuts that hold together the Drive Chains, and Idler cable. A pair of pliers will prevent the chain from twisting if the nut is stuck, which it probably will be. 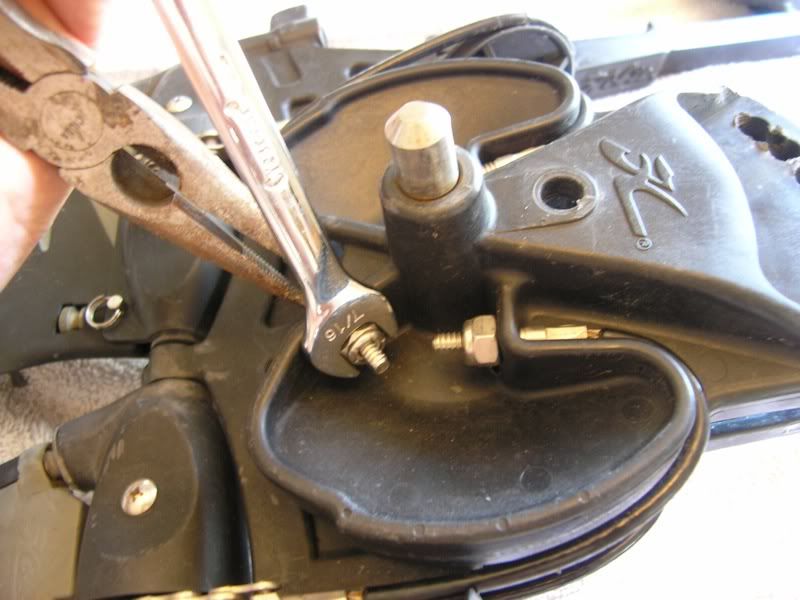 My chains have a bit of rust, but are still structurally fine. I am going to reuse. If a little rust bothers you, the replacement cables are relatively inexpensive and easy to replace. 2 nuts for each chain, and put the new chain in the old ones place. Super easy  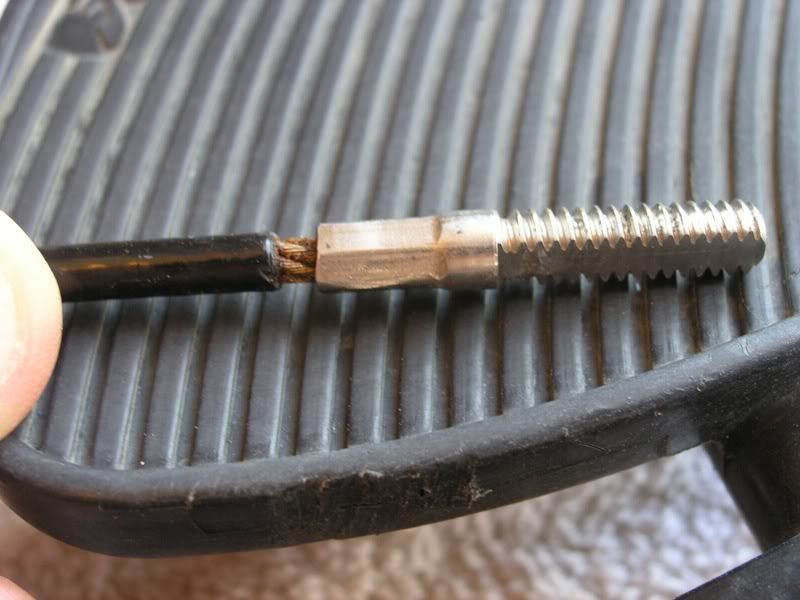 With all the nuts off, the damaged drum slid right off. No turning back at this point. 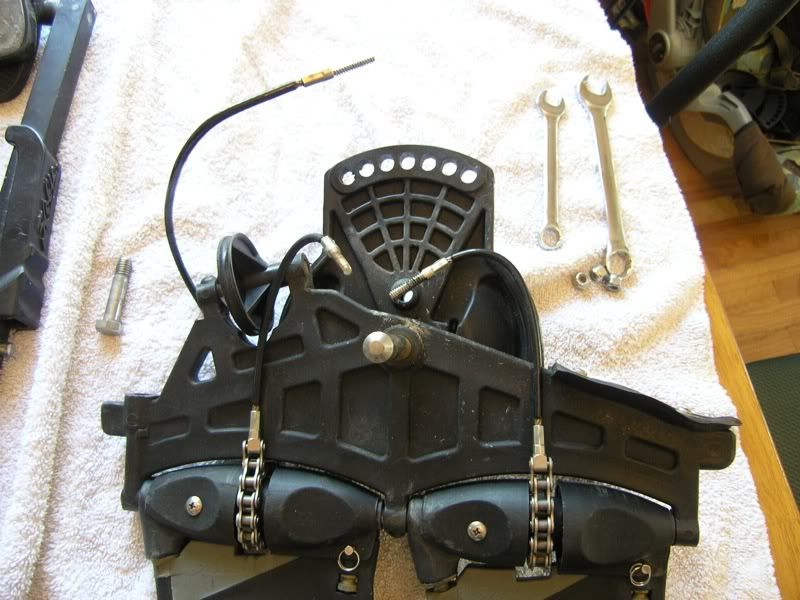 While it was off, I took the opportunity to clean and lube up the drum shaft. I used a marine grade, waterproof bearing grease. Any waterproof grease would probably do the trick. 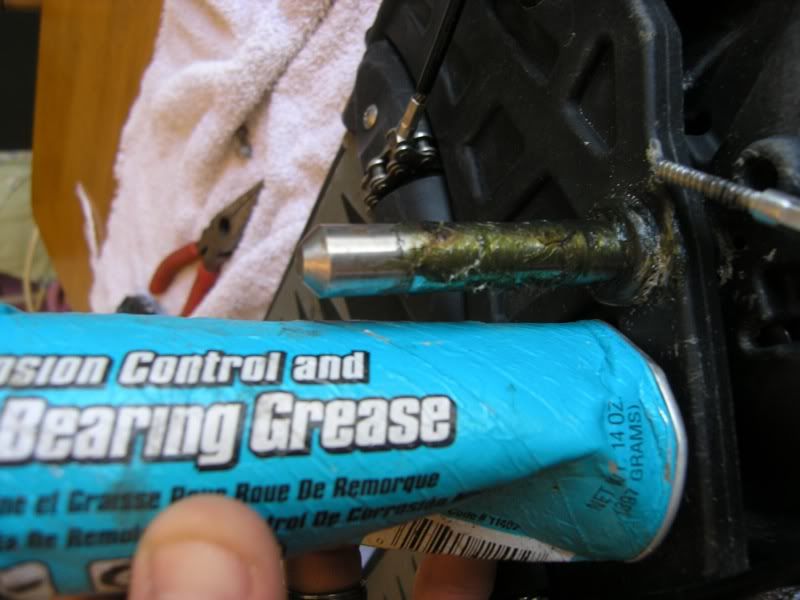 I also applied the lube to the sprocket shaft. 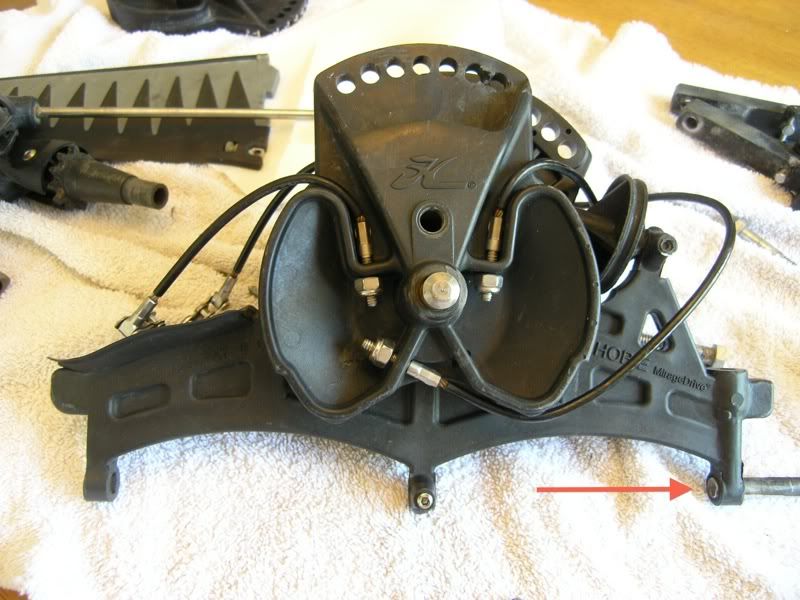 In hindsight, adding the grease to both the drum shaft and sprocket shaft made the most noticeable difference in the entire process. I guess I had not noticed that the drive had become tight, probably due to my neglect and a couple years of use. Once I put it all back together, it was incredible how loose and free the pedals moved. I’m anxious to get it out on the water to see if I will notice a difference. I bet I will. One thing that I love about Hobie, is that they are constantly innovating and improving any part of the product they can. Even to the smallest detail, they will find a way to improve. I was pleased to see this when I was installing the new Drum. 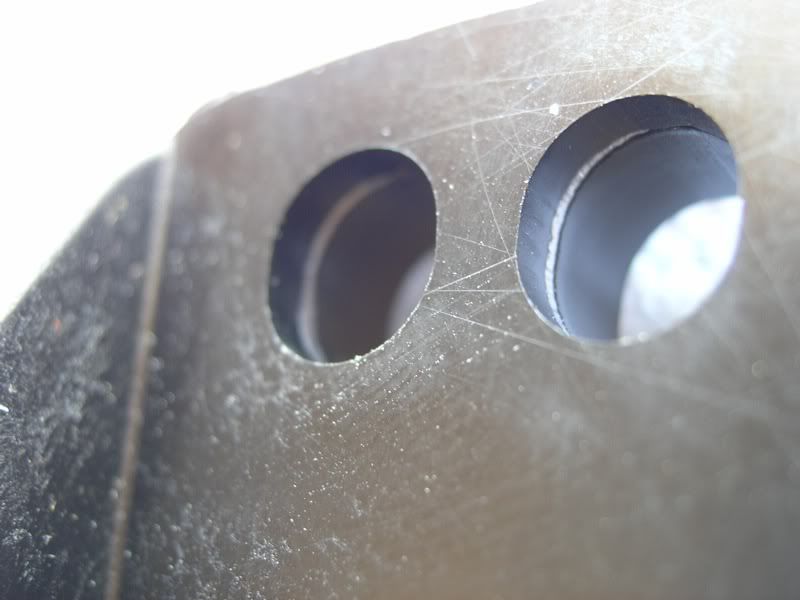 Hobie has reinforced the adjustment holes with metal, to prevent the damage that I had experienced. Skip a few more steps putting it all back together, adjust everything properly, and viola! I have a shiny new tuned up Mirage Drive  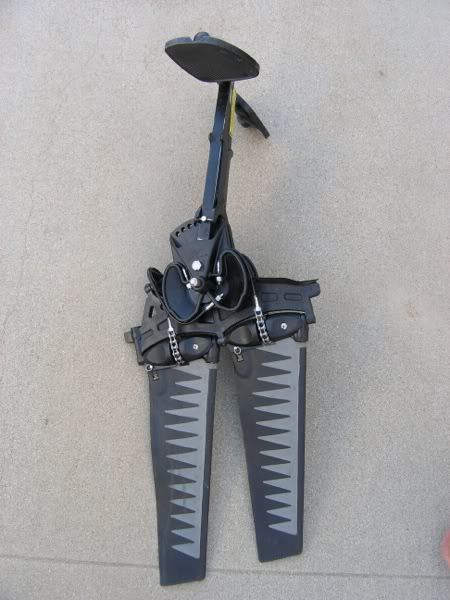 It is really pretty easy to upgrade parts on the mirage drive, make adjustments for a “tune-up”, or just perform a little maintenance. If you are unsure of what parts you need, or where to start I’d give Andy @ OEX a call and he’ll get you set up. Good luck! Next mission, on the water test  
|

|

|
|
05-15-2012, 05:41 AM
|
#2 | |
|
Senior Member

Join Date: Aug 2009
Location: Carlsbad
Posts: 591
|
Quote:
__________________

|
|
|
|
|
|
05-15-2012, 06:13 AM
|
#3 | |
|
Senior Member
Join Date: Sep 2005
Posts: 1,921
|
Quote:
 How do you make a mirage drive repair twice as much work as it should be? Put the sprockets on backwards the first time. How do you make a mirage drive repair twice as much work as it should be? Put the sprockets on backwards the first time.  I actually did notice that last night, only after I put the post up and looked at the pics, and fixed it. Good eye I actually did notice that last night, only after I put the post up and looked at the pics, and fixed it. Good eye
|
|
|
|
|
|
05-15-2012, 06:16 AM
|
#4 | |
|
Senior Member

Join Date: Aug 2009
Location: Point Loma
Posts: 584
|
Quote:
Thanks for the detailed descriptions and pics. |
|
|
|
|
|
05-15-2012, 06:24 AM
|
#5 | |
|
Senior Member
Join Date: Sep 2005
Posts: 1,921
|
Quote:
 The drive still will work, and snaps in while assembled backward, but it just looks funky having the Idler wheel pointed toward you. For all the guys that won't buy a Hobie because they don't have reverse, just follow this simple tutorial The drive still will work, and snaps in while assembled backward, but it just looks funky having the Idler wheel pointed toward you. For all the guys that won't buy a Hobie because they don't have reverse, just follow this simple tutorial 
|
|
|
|
|
|
05-15-2012, 06:45 AM
|
#6 |
|
Member
Join Date: Mar 2006
Location: Torrance. ca
Posts: 76
|
Great post Stevoooo. Fixed the same problem a while back.
|
|
|
|
|
05-15-2012, 06:50 AM
|
#7 |
|
Senior Member
Join Date: May 2011
Location: Orange County, ca
Posts: 684
|
nice post
|
|
|
|
|
05-15-2012, 07:38 AM
|
#8 |
|
Senior Member

Join Date: Feb 2009
Location: SAN DIEGO
Posts: 1,086
|
Like a bike, The mirage drive requires maintenance after so many miles.
I also take my mirage drive completely apart. Remove sand, lube, and inspect. The hardest part is figuring how to install the chains back on. the rest is easy! I Carry just about every moving part in my kayak. Including Chains and cable. Don't wait till somthing goes wrong Maintain your drive fellas! Good post. Last edited by driftwood; 05-15-2012 at 12:48 PM. |
|
|
|
|
05-15-2012, 08:41 AM
|
#9 | |
|
Senior Member
Join Date: Mar 2007
Posts: 265
|
Quote:
Don't wait until it fail on the water. Hobie minus mirage drive = B class kayak. (or even less) 
|
|
|
|
|
|
05-15-2012, 11:02 AM
|
#10 |
|
Banned
Join Date: Mar 2009
Location: on the road...
Posts: 598
|
I dig the cbass scales!
but its probably not the best idea to use grease on the shafts because with the sand it will become a lapping compound and bore out those nice tight hubs of yours  , use "dry lubes"....it also helps to pull out your drives before you land on the beach. , use "dry lubes"....it also helps to pull out your drives before you land on the beach.If your hard on you drives and dont want to deal with all the BS just sell your old ones, and buy a new set every season, that way u get all the new upgrades/parts, and your old ones will still be in very good condition and sell quickly for 300+. At any rate freshly tuned fins r nice! |
|
|
|
|
05-15-2012, 11:20 AM
|
#11 |
|
Senior Member

Join Date: Mar 2005
Posts: 2,563
|
Killer post Steve!
I am running out of excuses to put my fat arse on one of those
__________________
 [------------------------ [------------------------ <)))< ....b-a-a-a-a |
|
|
|
|
05-15-2012, 11:30 AM
|
#12 |
|
Senior Member
Join Date: Nov 2011
Location: South OC
Posts: 102
|
I need to do a rebuild soon but now I'm not as intimidated. Thanks for sharing. What was the cost of parts??
|
|
|
|
|
05-15-2012, 11:58 AM
|
#13 |
|
Administrator

Join Date: Mar 2005
Location: 1-2 miles off the point
Posts: 6,943
|
V2 parts are cheaper than V1
V2 drum each $16.50 Sprockets each $9.95 Chains each $37 idler cable $18.50 idler pulley $5.99 You only need to replace what is worn or broken.
__________________
 
|
|
|
|
|
05-15-2012, 12:54 PM
|
#14 | |
|
Senior Member

Join Date: Jun 2010
Location: Alhambra
Posts: 506
|
Quote:
what do you charge for this type of service? and what do you recommend in terms of the use of grease on the shaft? thanks |
|
|
|
|
|
05-15-2012, 01:03 PM
|
#15 |
|
Banned
Join Date: Mar 2009
Location: on the road...
Posts: 598
|
seems like the drums and idler cable are the major wear items for me....i really like the new style drums with the metal inserts. Anyone not running these newer hubs should up-grade for the $32....probably throw on a new idler cable while your at it and keep the old one as a backup.
|
|
|
|
|
05-15-2012, 01:14 PM
|
#16 |
|
Senior Member
Join Date: Feb 2009
Location: SAN DIEGO
Posts: 1,086
|
Seems to me that the chains/cables after a while strech a little. So i replace the chains every year. I igree with scallywag, that much grease on the shaft is only going to attract more sand and wear out the hub on the drum.
|
|
|
|
|
05-15-2012, 01:26 PM
|
#17 | |
|
Senior Member
Join Date: Sep 2005
Posts: 1,921
|
Quote:
 I'll try this way for a while, and if it looks to be getting gummed up I'll experiment a little more with some other stuff. I'll try this way for a while, and if it looks to be getting gummed up I'll experiment a little more with some other stuff. The idea to keep an extra set of cables on the yak is good too, just in case an OTW repair is needed. I also like the upgrade every year plan as well. Kinda like a good cell phone policy. I might start a "new every two" mirage drive program
|
|
|
|
|
|
05-15-2012, 01:33 PM
|
#18 |
|
Senior Member

Join Date: Mar 2007
Location: Orange
Posts: 207
|
Sweet thread. I will be doing this soon.
|
|
|
|
|
05-15-2012, 01:59 PM
|
#19 | |
|
Senior Member
Join Date: Aug 2009
Location: Carlsbad
Posts: 591
|
Quote:
The easiest maintenance/repair is definitely the new Hobie every year. You won't even get your hands greasy.
__________________
|
|
|
|
|
|
05-15-2012, 02:05 PM
|
#20 | |
|
Senior Member
Join Date: Nov 2011
Location: South OC
Posts: 102
|
Quote:
|
|
|
|
|
|
|
|


 Linear Mode

