|
|||||||
| Home | Forum | Online Store | Information | LJ Webcam | Gallery | Register | FAQ | Community | Calendar | Today's Posts | Search |
 |
|
|
Thread Tools | Display Modes |
 09-16-2010, 06:57 PM
|
#21 | |
|
Member

Join Date: Aug 2010
Posts: 30
|
Quote:
If you're using the through hole and your pump is above the water line, you have to prime the pump in order for the system to work. Wondering if you did that. If not, that's the problem. |
|

|

|
|
09-16-2010, 07:13 PM
|
#22 | |
|
Greg

Join Date: May 2010
Location: Chula Vista, ca
Posts: 509
|
Quote:
|
|
|
|
|
|
10-08-2010, 04:46 PM
|
#23 |
|
Member
Join Date: Aug 2010
Posts: 30
|
***Reposting as requested because I did some house cleaning on Flickr and accidentally deleted the linked photos. Oooops. Too bad I can't go back to edit the original post. ***
I always enjoy the concept of community and "open source" innovation that goes along with that in cyberspace. Rerigging my kayak and took the collective ideas of those who shared in the past and added my own take on it. For this post, I wanted to give a couple of quick examples of how I did things this time around in respect to my live well/bait tank v2. I wanted a few additional things/goals out of this project.
Pictured here is the Vittle Vault 15 in a stone finish. I have seen it also in a warmer/pinkish stone color as well. Got it on sale for about $22 at PetSmart. Petsmart seem to have it for cheaper than Petco. 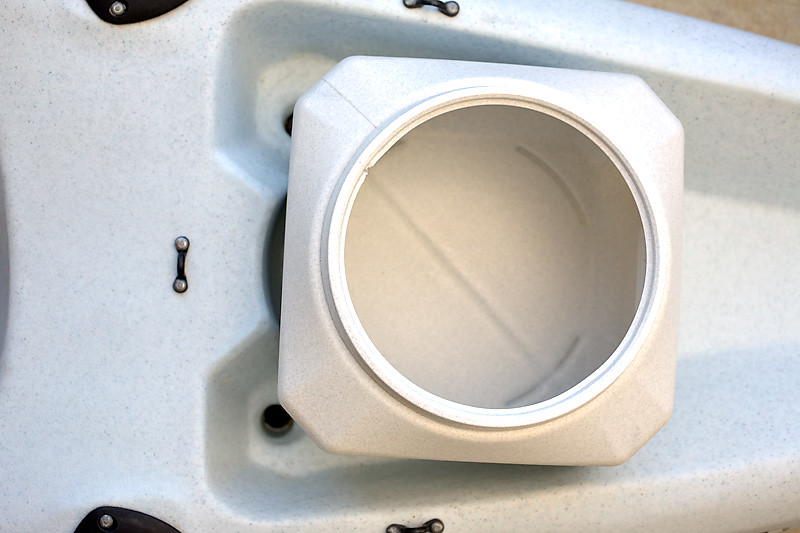 This container can hold almost 4.7 gallon of water according to the mfg website. Because the Vittle Vault 15 is wider than a 5gal bucket, it helps to keeps the center of gravity lower when filled with the same amount of water. In both vessel, I never actually fill it all the way to capacity. Because of the higher walls and narrower footprint of the 5gal bucket, I keep my water level lower than I do with the Vittle Vault. Therefore, the Vittle Vault allow me to have more water capacity and still maintain at or a lower center of gravity than the popular 5gal bucket. Moving on...  Powering my tank is a Johnson 500GPH pump. It was the cheapest one I saw at West Marine for $26.99. Linked here. 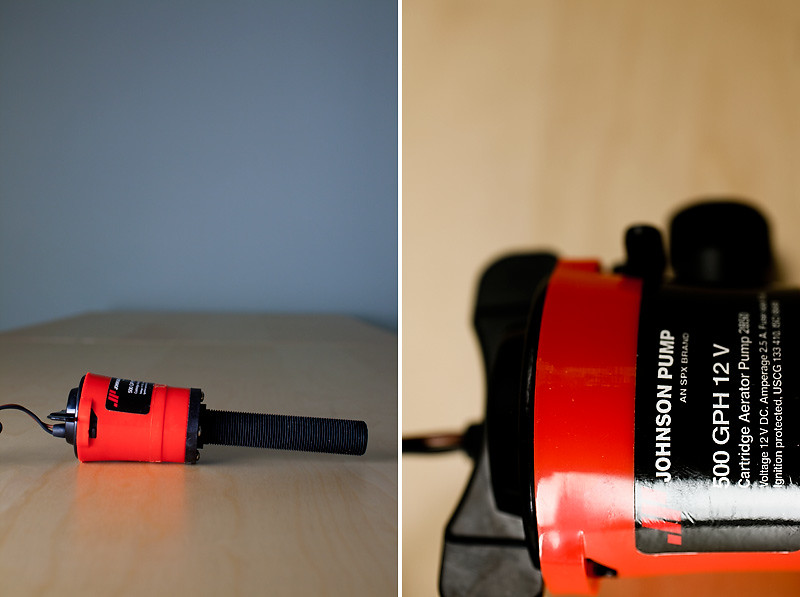 I sawed off a portion of the threaded tube to fit the included hose barb. It's ready for the scupper pickup hose and inline check valve as detailed below. 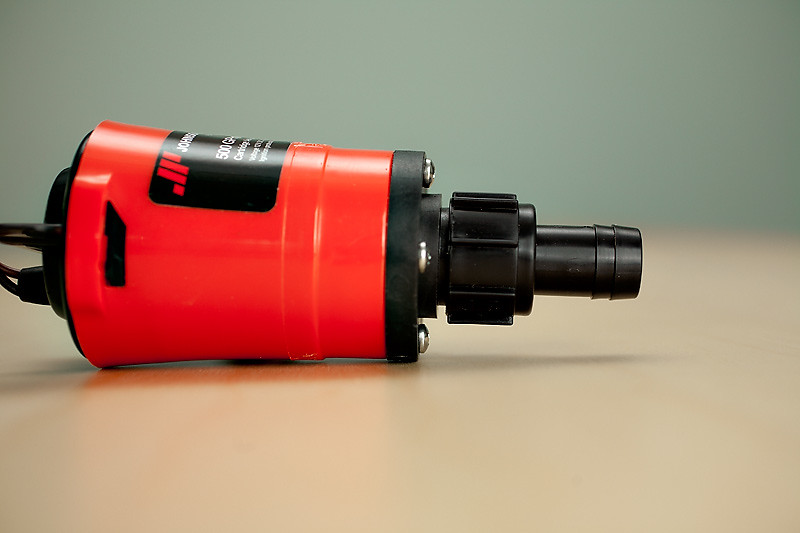 I salvage from my old bait tank a plastic inline non-return check valve. I bought it from West Marine for about $15 a few years back. I sawed off a portion of the bottom so it does not protrude past the bottom of the scupper hole below the kayak. The non-return valve prevents the pump from losing prime accomplishing goal #1 on my list. A reinforce 3/4" hose attaches perfectly over the valve and the barb end of the pump without any need for clamps. This allows the hose assembly to fit into the Pro Explorer's tiny scupper perfectly without any drag from below. This accomplished goal #2 on my list. 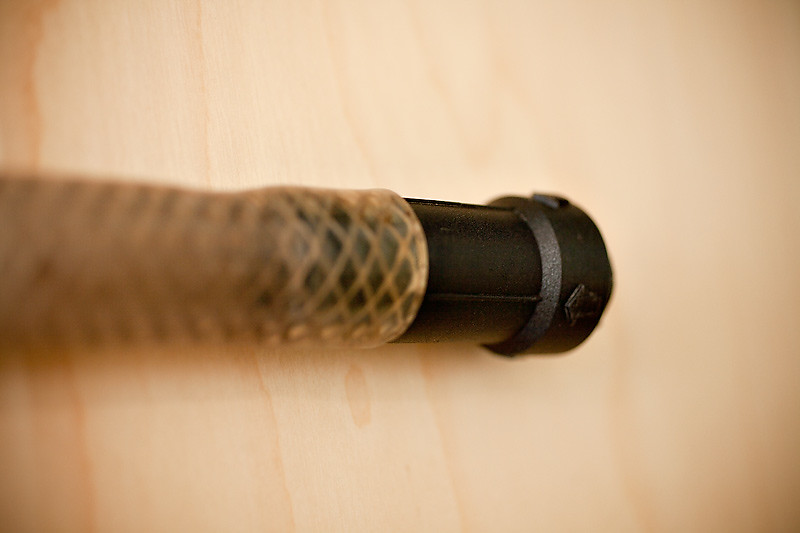 I added a regular hose aerator mesh for about $1 found in any ole hardware store to help prevent large debris from getting picked up and fouling the pump. This worked well in the old bait tank without any issue so I kept the same idea for this one. Here's the pump and assembly attached to the bait tank. And a shot from the inside. I purchased a big rubber washer at Ace Hardware that fits perfectly and seal the area, preventing any leakage. 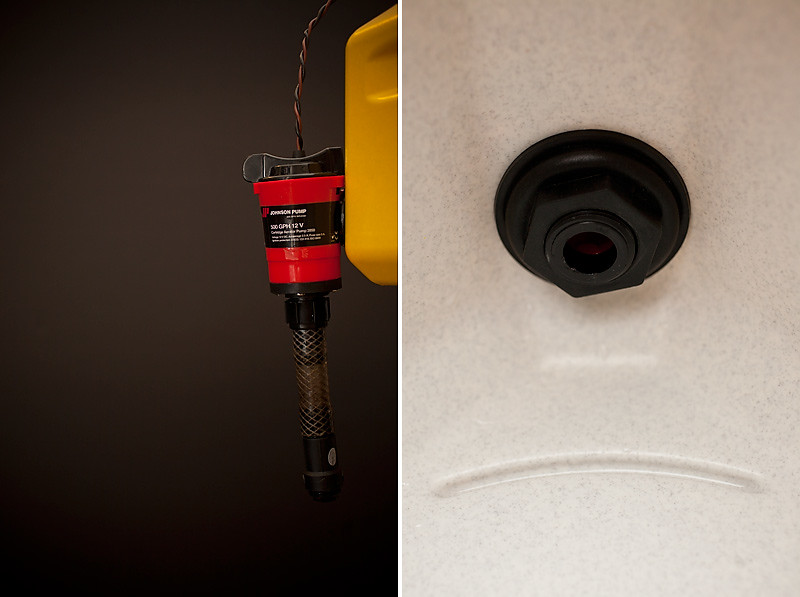 Moving on... I chose to locate the water intake towards the bottom of the tank. Hoping that the water intake there will oxygenate the bottom of the bait tank column where it may need the most oxygen once bait fish congregate there. Note also that being on the bottom makes the inline check valve even more necessary so you don't lose water like the Hobie bait tanks does. You can put a screen to prevent any scales and other stuff from traveling back down the pump if you'd like. Mine is located high enough off the bottom that I haven't had any issue.  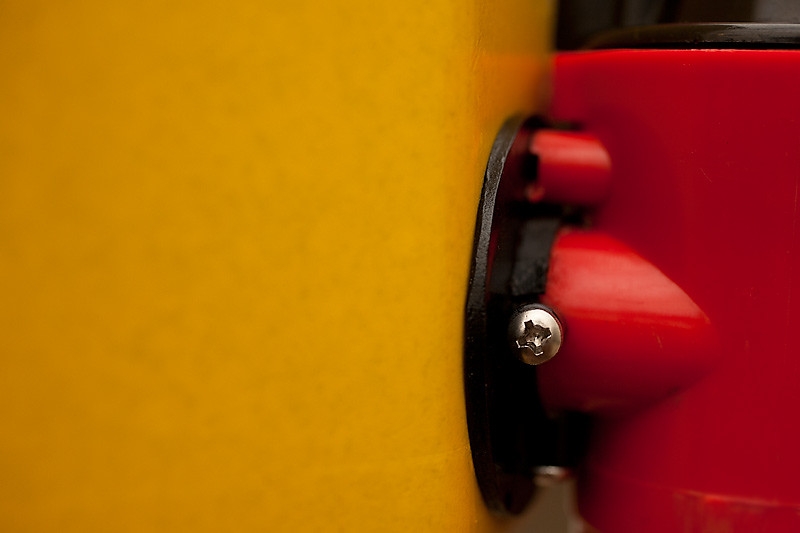 Bonus: locating the intake on the bottom of the tank allow me to have a very nice finish product where you don't see much of any plumbing above your kayak hull. The pump hugs the bottom of the kayak, sitting just above the scupper hole. Nice and out of sight. For the drain, I found a variable tube at Home Depot for about $5-$6.  I later found out that there are two diameter tubes available. This is the larger diameter size. Had I known, I probably would have gone with the smaller diameter to leave as much room inside the bait tank as possible. Anyways, with it, I can vary the water level on the fly, accomplishing goal #3. 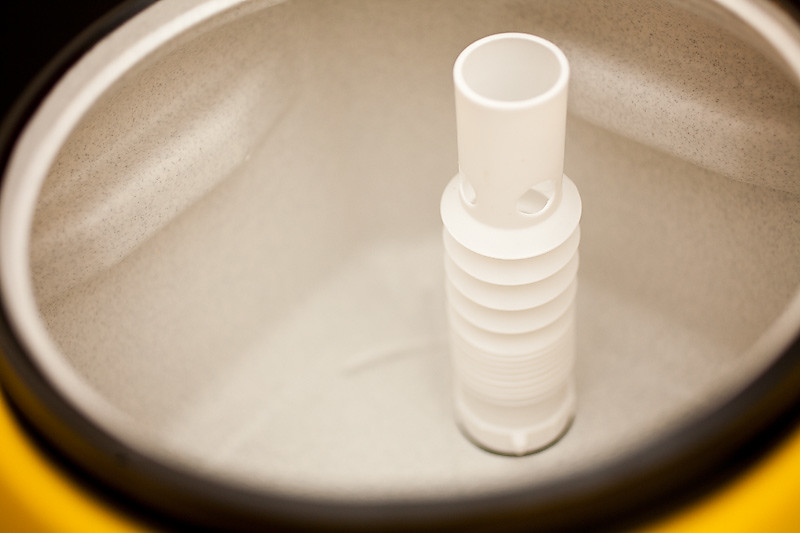 I chose to locate the tube off set from the center for a couple of reason. One, it's closer to the scupper hole on my kayak. And two, it allows more room in the middle of the tank for when I use it as a live well to hold tournament catches. There's still enough room on the side to allow sardines the freedom to swim about Here's a shot from the bottom. The gasket was easily made from a blown inner tube and everything is glued together. If the container seam wasn't there, I would have made the outlet hole where the seam is in the photo. So something to think about. 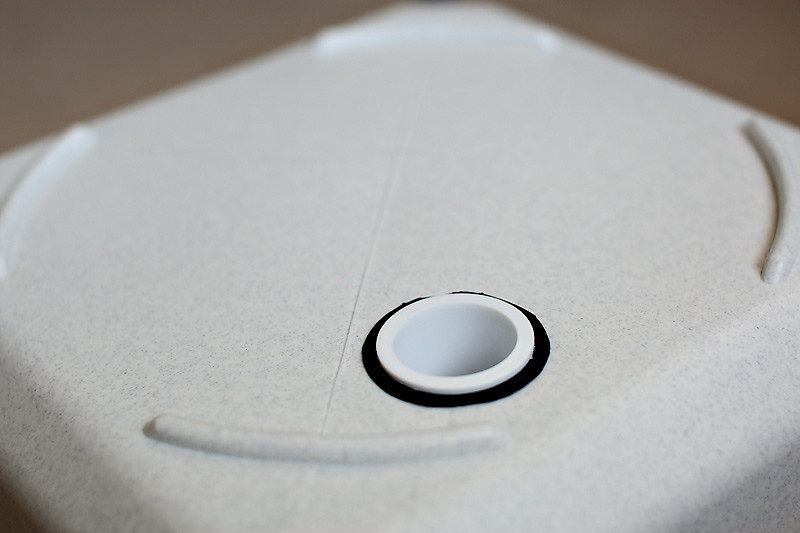 To drain the water, I reach behind me and unscrew the tube. Works for me. Moving on... Finally, for power, I use a 6v 12ahr SLA. But I found that running power to the pump regularly (positive lead to positive, negative to negative) still brings water into the tank at too brisk a rate. So I purchased a 3 position on/off/on DPDT toggle switch from Ace Hardware for ~$8. Then rigged it up for reverse polarity in one position, and normal polarity in the other position. This is a very common need for most hobbyist and they even sell reverse polarity DPDT switches. I didn't know of any places nearby that sells these switches already set up for reverse polarity so I simply soldered the wires myself. 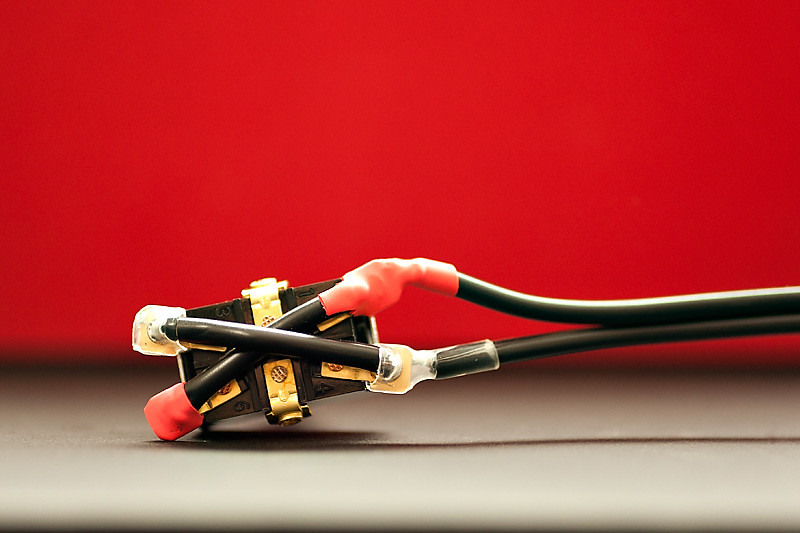 The motor would hook up to the middle terminals. So turning it on one way will give me the full speed water pickup from the Johnson 500 hooked up to a 6v source. Toggle the switch to the opposite on position will reverse the motor, slowing down the water intake to perfect life sustaining level for the smaller bait fish IMHO. 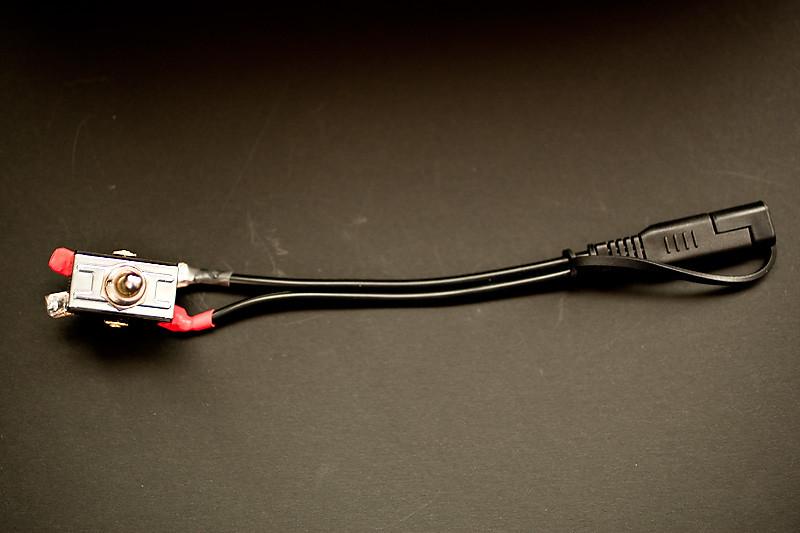 A rubber switch boot and putting the switch into a water resistant container finishes up the electrical component and accomplish goal #4. Follow this link for a quick video of it in action. http://www.youtube.com/watch?v=G7Ky-rvEPII Anyways, hope these examples help jot ideas of your own. |
|
|
|
|
|
|


 Linear Mode

