|
|||||||
| Home | Forum | Online Store | Information | LJ Webcam | Gallery | Register | FAQ | Community | Calendar | Today's Posts | Search |
 |
|
|
Thread Tools | Display Modes |
 05-19-2015, 12:40 PM
|
#1 |
|
Grey Haired Senior Member

Join Date: Apr 2008
Location: So. Orange County
Posts: 53
|
Hobie PA 12 Minn Kota motor build
I used a standard Hobie plug, installed some aluminum plates for support and encountered some trial and error. Berfore you start something like this, check the exterior diameter of any motor, the blade path and the width of your particular plug hole. Hobie PA's have a wider hole then some of the older Revo's - this unit will not fit in my Revo. Drilling out the support plates  Preliminary mounting   Opted to reinforce the internal of the plug with some foam - this was a treat and a learning experience   
__________________
- - - "I'm fishing as hard as I can" - - - Last edited by Montesdad; 05-20-2015 at 10:59 AM. |

|

|
|
05-19-2015, 12:45 PM
|
#2 |
|
Grey Haired Senior Member
Join Date: Apr 2008
Location: So. Orange County
Posts: 53
|
Checking the preliminary fit -
   still checking the fit - dremeled off the excess of the stainless steel screws 
__________________
- - - "I'm fishing as hard as I can" - - - |
|
|
|
|
05-19-2015, 12:49 PM
|
#3 |
|
Grey Haired Senior Member
Join Date: Apr 2008
Location: So. Orange County
Posts: 53
|
Ok - we have a problem here. Getting the thing in and out is going to be an issue. It won't maneuver properly with the seat in place - this is going to be a pain.
 Even with the top off, it won't fit - hummmmmm!!!!  Ah - the solution, it comes and goes quite easily this way. Spin it around, drop the head into the storage hatch and it comes and goes easily - Just need to make sure the prop is lined up when taking it out. 
__________________
- - - "I'm fishing as hard as I can" - - - Last edited by Montesdad; 05-19-2015 at 01:43 PM. |
|
|
|
|
05-19-2015, 12:53 PM
|
#4 |
|
Grey Haired Senior Member
Join Date: Apr 2008
Location: So. Orange County
Posts: 53
|
So, now we shorten the post so it sits lower to the water and is out of the way for fishing - after eyeballing and doing this cutting, I would have left the post about two inches longer but, it still comes and goes easily.
 I inserted a cut down paint stir stick to make sure I didn't cut any of the wires with the hacksaw - 
__________________
- - - "I'm fishing as hard as I can" - - - |
|
|
|
|
05-19-2015, 12:58 PM
|
#5 |
|
Grey Haired Senior Member
Join Date: Apr 2008
Location: So. Orange County
Posts: 53
|
Now for the electronics - I cut the wires down the same amount of the post removal, put fresh connections on them and rewired so there wouldn't be so much left over. Drilled a fresh hole for the top mount and put it all back together.
 Decided to trim the propeller guard off to help with facilitating removal and insertion into the plug hole. In retrospect, I could have left it on - just seems a bit easier for removal. I figure I'm not going to be running over any objects and I always have me pedals stowed as a backup. 
__________________
- - - "I'm fishing as hard as I can" - - - Last edited by Montesdad; 05-19-2015 at 07:15 PM. |
|
|
|
|
05-19-2015, 01:03 PM
|
#6 |
|
Senior Member
Join Date: Feb 2013
Location: San Diego
Posts: 619
|
Dont forget to register your PA now that your a motorized vessel.
|
|
|
|
|
05-19-2015, 01:08 PM
|
#7 |
|
Grey Haired Senior Member
Join Date: Apr 2008
Location: So. Orange County
Posts: 53
|
I didn't want to run the power cables directly thru to the battery - so I picked up a black cutting board at Bed Bath and Beyond which had a very convenient hole in just the right place. Cut a piece off to the same dimensions as the Hobie pole holder unit where it'll go.
If fit perfectly with a West Marine plug that I picked up for $20.  I installed a recommended 50 amp manual reset circuit breaker to the back side of the plate and installed it on the right side of the yak in place of the pole holders. Made a little mounting plate and epoxied the unit to the back of the plug place internally  Some basic wiring started   A Sealed, Lead Acid, GEL type, 55 AMP NF-22 battery fits perfectly between the scupper tubes internally directly under the center of mass/seat. 
__________________
- - - "I'm fishing as hard as I can" - - - Last edited by Montesdad; 05-22-2015 at 05:02 AM. |
|
|
|
|
05-19-2015, 01:12 PM
|
#8 |
|
Grey Haired Senior Member
Join Date: Apr 2008
Location: So. Orange County
Posts: 53
|
A little something I added to keep the prop in line with the bottom of the hull as it angles back slightly when under load -
  Just checking things out and almost done - 
__________________
- - - "I'm fishing as hard as I can" - - - Last edited by Montesdad; 05-19-2015 at 01:34 PM. |
|
|
|
|
05-19-2015, 01:21 PM
|
#9 |
|
Grey Haired Senior Member
Join Date: Apr 2008
Location: So. Orange County
Posts: 53
|
I went over to an auto parts store and picked up a cheapie set of jumper cables with size 8 wiring for my internal wires from the circuit breaker to the battery.
Replaced the big clamps with some smaller ones for the battery attachment. Also, one can attach their fish finder wires the battery if so desired. Anyway, the finished product.   Notice the clamp I added on the post above the motor - this keeps one from pulling the motor up past a point that the prop will hit the bottom of the hull. Minn Kota states that with this motor which has 5 forward and 3 reverse speeds, one uses about 8 amps at setting 1, 16 amps at 2, 24 at 3, 32 at 4 and all 40 at 5 or full speed. A 55 amp hour battery should last accordingly - I don't know as I've not worn down the battery enough to have the unit shut down on me. The top of this motor has a battery meter that checks battery strength at 100%, 75%, 50% and 25% as long as the motor is not turned on. Anyway - works great, just wanted to share as it was a fun little project. Not making any statements on CF numbers - you should checkout the regs for your personal usage. I drop it in when I get outside, peddle around in the harbor and at fishing spots. Be sure to secure it with some parachute cord and a clamp of some sort to the yak.
__________________
- - - "I'm fishing as hard as I can" - - - Last edited by Montesdad; 05-26-2015 at 07:42 AM. |
|
|
|
|
05-19-2015, 02:02 PM
|
#10 |
|
Xcoastie
Join Date: Jun 2013
Location: Westminster
Posts: 285
|
That's a sweet setup man! Very clean!!
If that's the Marineco trolling motor plug, be extra certain the screw in terminals for the wires are good and solid. Yank on them before each use. Mine would loosen and fall out eventually. I opted to solder the wires to the plugs. No easy task. And the nubs on the casette are going to eventually break. When it does replace it with an old shaft from your mirage drive. |
|
|
|
|
05-19-2015, 02:14 PM
|
#11 |
|
Senior Member
Join Date: Feb 2009
Location: SAN DIEGO
Posts: 1,086
|
Nice Job! however, I prefer a motor that doesn't take up/eliminate your Mirage drive pedals. I like the idea of using both the pedal and motor at the same time.
By using both the mirage drive pedal power and electric motor simultaneously your battery will last a lot longer and you'll go faster and longer with less strain on your legs. your project looks good though, let us know how you like it. |
|
|
|
|
05-19-2015, 02:33 PM
|
#12 |
|
Member
Join Date: Nov 2012
Location: Laguna Niguel
Posts: 89
|
Great post and pics. Very informative as well.
I'll be thinking of you when you see that big boil way off in the distance and your legs and arms are already beat. Just click on the switch and away you go. Gotta be nice as well at the end of the day when an offshore wind kicks in and you've got that added power coming in. |
|
|
|
|
05-19-2015, 07:24 PM
|
#13 | ||
|
Grey Haired Senior Member
Join Date: Apr 2008
Location: So. Orange County
Posts: 53
|
Quote:
I wanted a fairly snug fit with a little wiggle room In addition, I went up to a metal supply shop in Irvine and picked up several 1/2" rods, some stainless tubing and a couple other aluminum. I've seen a couple other setups with one of each. Appreciate the feedback - Quote:
Like I said, was just having some fun - great little project.
__________________
- - - "I'm fishing as hard as I can" - - - Last edited by Montesdad; 05-19-2015 at 07:30 PM. |
||
|
|
|
|
05-20-2015, 05:18 AM
|
#14 | |
|
Grey Haired Senior Member
Join Date: Apr 2008
Location: So. Orange County
Posts: 53
|
Quote:
Thanks for the comments and if someone uses these plugs - first thing you should do is replace those little internal screws which are coated brass with stainless steel. Got mine at DeNaults True Value.
__________________
- - - "I'm fishing as hard as I can" - - - |
|
|
|
|
|
05-20-2015, 04:34 PM
|
#15 |
|
Senior Member
Join Date: Jan 2012
Posts: 2,523
|
So , how much are you gonna charge me ?
Well done .
 . I want one . . I want one .
|
|
|
|
|
05-20-2015, 08:50 PM
|
#16 |
|
Senior Member

Join Date: Mar 2011
Location: Santa Ana/Westminster
Posts: 1,256
|
What's the total cost in the project?
__________________
Kevin Yellow PA12 |
|
|
|
|
05-21-2015, 06:26 AM
|
#17 |
|
Senior Member

Join Date: May 2007
Location: Palos Verdes
Posts: 1,836
|
new cassette
Try the new Hobie plug/cassette, it is much sturdier and the locking nubs on the sides are much stronger...also...there's no need to hack up the motor..the Motor Guide R-3 fits right through the mirage drive hole. I run the cable thru the boat and use the minnkotta flushmount three-prong twist-plug for the power, rigged by the mast mount up front...nice and clean rig.
 I also use a larger battery mounted behind the seat which still allows for the bait tank to fit and a longer run time. I have the same small PWC battery that you have and I use it for my Scotty power hauler... but it really doesn't give me very much run time with the trolling motor. The R-3 is only about $125. I take my mirage drive with me as backup but haven't had to use it yet.  Before I started the project I went to the "Trolling Motor Doctor" in Long Beach and we tried all his smaller (affordable) motors untill we found a good one that fit in the mirage drive hole. The R-3 with the 2 blade prop fit best. He was quite helpful and really knew all the motors very well. Since I'm on the Hobie team I tried to stay away from the Johnson products (Minn Kota).
__________________
Jim / Saba Slayer 
Last edited by Saba Slayer; 05-21-2015 at 06:47 AM. |
|
|
|
|
05-21-2015, 12:23 PM
|
#18 |
|
Senior Member
Join Date: Mar 2011
Location: Santa Ana/Westminster
Posts: 1,256
|
Which R3 is that, there seems to be a few different models.
__________________
Kevin Yellow PA12 |
|
|
|
|
05-21-2015, 07:26 PM
|
#19 |
|
Senior Member
Join Date: May 2007
Location: Palos Verdes
Posts: 1,836
|
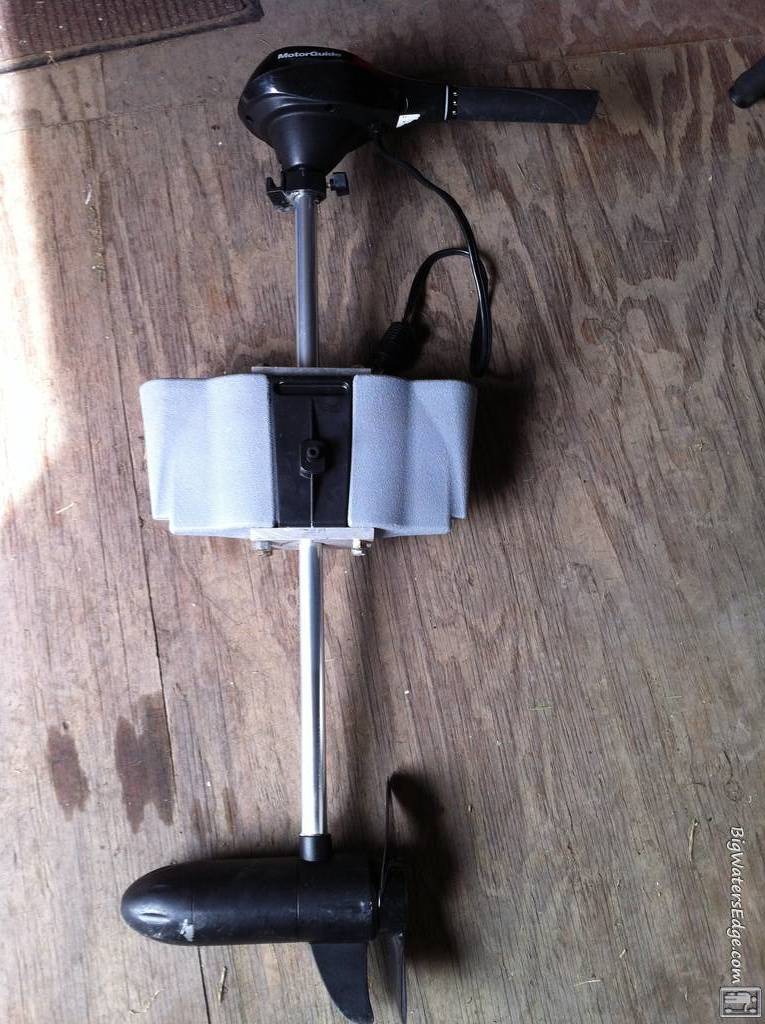
R-3
Raskal
Here is a photo of the motor... 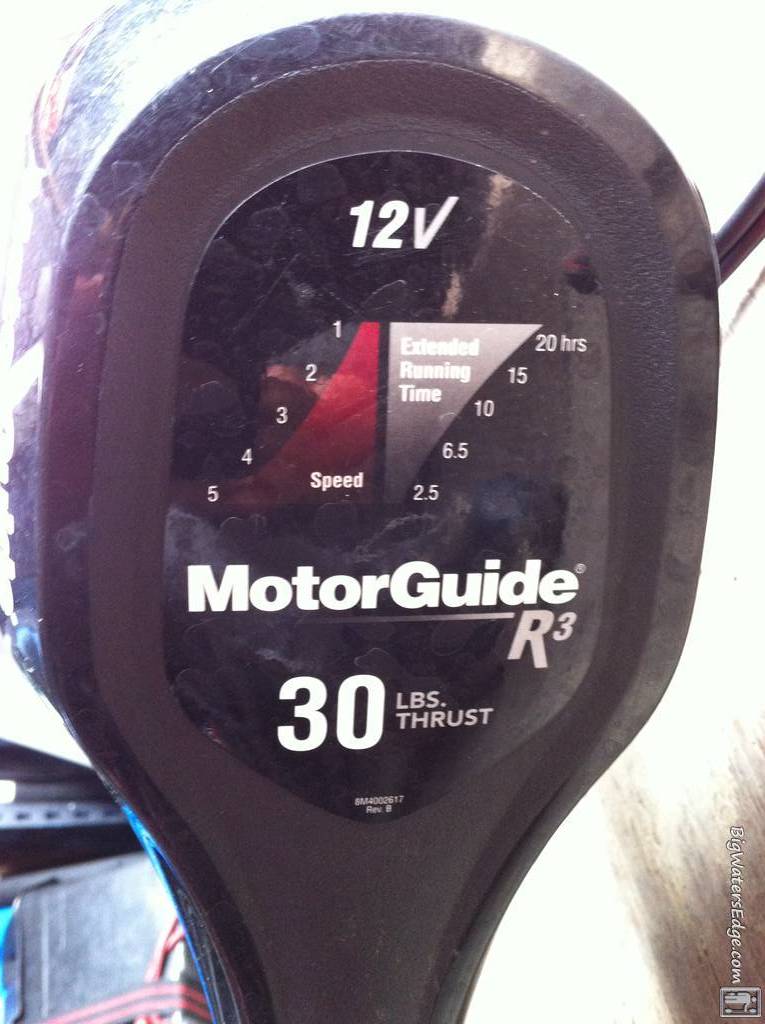
__________________
Jim / Saba Slayer
|
|
|
|
|
05-22-2015, 05:12 AM
|
#20 |
|
Grey Haired Senior Member
Join Date: Apr 2008
Location: So. Orange County
Posts: 53
|
I remember seeing a picture of your motor before starting - gave me some ideas on my project.
I wanted an internal battery - just too many times out on the ocean on a bad in my revo, surf launches etc. - seemed best to keep the center of gravity as low as possible. Looked at the Motorguides with 30 pounds of thrust - they will get the job done. Was down at West Marine with my yak on the top of the car and they had two of these salt water Minn Kota units left - we took it out of the box and saw that the motor housing was 3.25" and I had 3.35" of plug hole clearance and it fit with the two blade prop that comes with it. Since they were offering a discount - brought it home and went that way. If I was just doing flat water fishing and needed extended range - an exterior battery pack like yours might be the way. Really, the only hacking I did that I now feel was necessary is to shorten the post - With an internal battery and the R-3 motor, they'll fit on a Revo without having to go the +$2K range for a Hobie unit with a Lithium battery.
__________________
- - - "I'm fishing as hard as I can" - - - |
|
|
|
|
|
|


 Linear Mode

