
 |
|
|||||||
| Home | Forum | Online Store | Information | LJ Webcam | Gallery | Register | FAQ | Community | Calendar | Today's Posts | Search |
 |
|
|
Thread Tools | Display Modes |
|
|
|
|
#1 |
|
Member
Join Date: Dec 2013
Location: Santa Fe Springs
Posts: 42
|
here is the front view. Changed the chair, put off road lights, and got it wrapped. Also got the ram mount for my transducer to hang off the side, and hid the 12v in my tackle box in the middle of the kayak. My electrical has all lazer etched switches for each light and have a usb cord if I need to charge my phone, you can see how neat the wiring is in picture 3.
Last edited by ROOKIE87; 02-26-2014 at 12:50 PM. |
|
|

|
|
|
#2 |
|
Senior Member
Join Date: May 2013
Posts: 157
|
I didn't want to drill a hole in my kayak to put my live well pump switch on so I needed a different way to cover the switch. Just a female and male PVC cap fitted together with the switch inside. I'm sure someone sells something like this but I figured I'd make one out of PVC for a dollar.
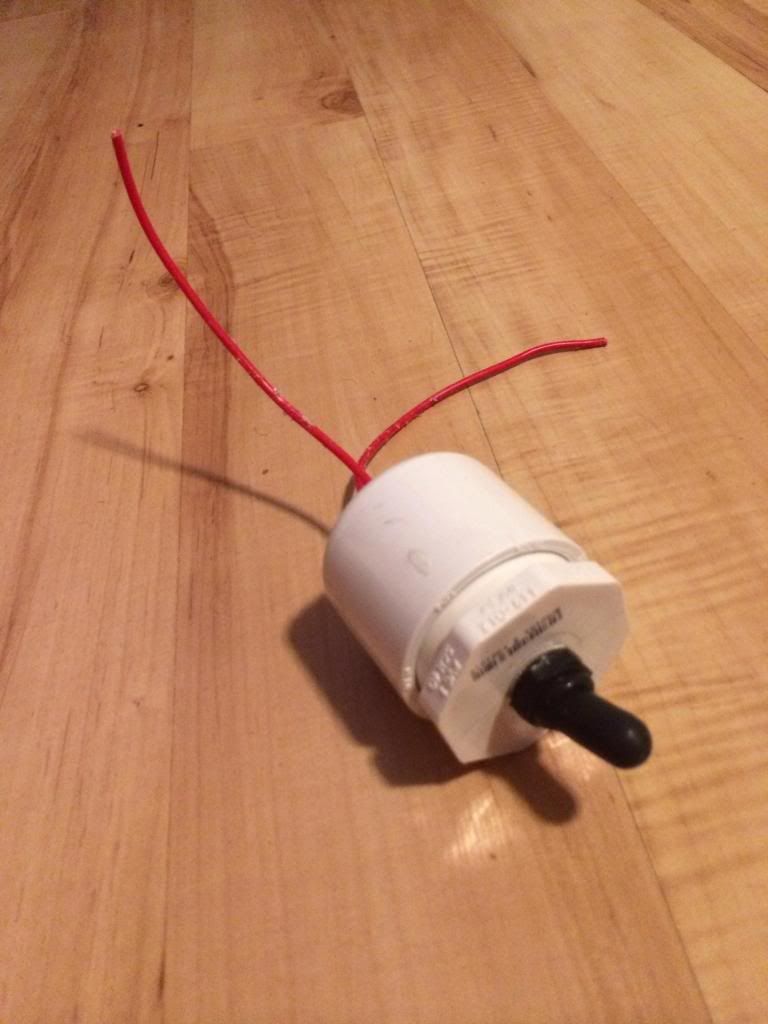
__________________
fish forever, work whenever |
|
|

|
|
|
#3 |
|
Junior
Join Date: Mar 2011
Posts: 6
|
Pro Angler 14 dual seats Innovation
Pro Angler 14 Dual seats/tandumn seats.
This is such a big boat, why be selffish share a ride. 
|
|
|

|
|
|
#4 |
|
Senior Member
Join Date: Mar 2011
Location: Santa Ana/Westminster
Posts: 1,258
|
interresting....
__________________
Kevin Yellow PA12 |
|
|

|
|
|
#5 |
|
Catch and Release(#2)
Join Date: Oct 2013
Location: Oceanside
Posts: 77
|
OHHHHH CRAP!
OH my my my What do I do, im to far out to turn back I wont make it. My legs are shaking, im in a wet suit or waders and im going into labor.
DUN DUN DUNNNN INTRODUCING THE NEW HOBIEWANand2KANOBIE. Look at the pictures and figure it out, no instructions included. For the wan use the hose, for the 2 hold your nose. Close the lid and stop water from going into the kayak The Pro anglers cutting board changes to a magazine/newspaper table For hobie kayaks only 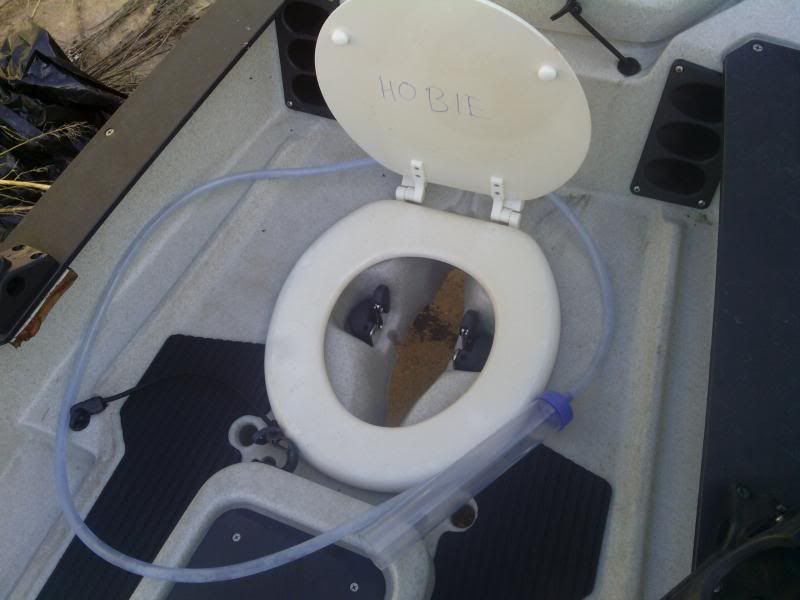
__________________
Philippians 4:13 I can do all things through Christ who strengthens me  Caddiyak PA14 Last edited by ChristLike; 03-15-2014 at 05:16 PM. |
|
|

|
|
|
#6 |
|
Member, You Member!
Join Date: Jul 2011
Location: Lake Forest
Posts: 254
|
Hahahahahhahahaha!!! That innovation is the shit!!!
|
|
|

|
|
|
#7 |
|
Senior Member
Join Date: Apr 2012
Posts: 291
|
reel covers
not my original idea but didn't see anybody post it yet. They work great especially for the bigger reels
|
|
|

|
|
|
#8 |
|
Junior
Join Date: Sep 2014
Location: Louisville, TN
Posts: 6
|
Add on to the stealth 12.
Grabbing extra poles are easy from the stock rear holders, But being a short person I had problems reaching my extra poles, net or gaff from the stock front pole holders. The 2012 has threaded inserts behind the seat so with a piece of aluminum square stock screwed into them and four scotty mounts I fixed that problem. Now i can reach all my gear from behind me. this is what the finished product looks like.
Having four additional mounts without drilling any holes in the kayak makes it easy to change the layout when needed. This also makes it easy to remove if I were to sell it to someone that didn't want the extra mounts behind them. Also with the built in bait well I don't need to reach behind me for a bait bucket. |
|
|

|
|
|
#9 |
|
Senior Member
Join Date: Feb 2013
Location: San Diego
Posts: 619
|
Had to redo PVC Rod holder on the yak. It works great and gives you back support.
|
|
|

|
|
|
#10 |
|
No Pray, No Pay!!
Join Date: Apr 2015
Location: Costa Mesa, CA
Posts: 27
|
some great ideas, thank you...

|
|
|

|
|
|
#11 |
|
Newby
Join Date: Jan 2012
Location: Menifee, CA
Posts: 6
 |
Fish Bag!
After almost losing my YT to a Hammer, while on a fish clip a couple weeks back, I decided to get an insulated fish bag to accommodate my long paddles in hot temps and sharky waters. Found a nice product on Amazon for $120, but procrastinated too long before ordering and wanted to fish last weekend. So, I went to Lowes and bought some reflective insulation material, Silicone caulk, Velcro pads, and foil tape. $35 and an hour later, I had a Redneck fish bag to fit perfectly in the rear and under the bungies of my Stealth-14! I took (2) 7lb bags of ice; which I kept below in a collapsible cooler in the front hatch, until needed. After picking up a small YT and a Bonito, I emptied one bag of ice in the foil bag along with the bled fishes. 2 nice 15-16lb YT tail and a Bonito later, I added the second bag of ice. Caught a 3rd respectable yellowtail on the paddle in, which I slid under the bag, being it was already bulging! I did roll it in the surf, not surprising with my heavily loaded yak plus the added 80lbs of fish in the trunk. BUT, surprising the bag held up nicely, and was floating alongside and easy to retrieve. Had to look around for a minute to find the "loose" YT being tossed in the surf; which a nice gal retrieved for me, during this sharky "closed-beach" day in LaJolla! After a 10 hour day on the water, I still had a 3/4 bag of un-melted ice, and the fish were nice and cool. The only difficulty was cleaning the bag.... which I expected would be a one-time disposable and shreaded from fins anyhow? I simply opened up one long seam to wash thoroughly which I will later need to retape. Caulk did not do much for adding strength, but did keep the blood and fish juices from draining through the scupper! Also on a bad fish day, it could double as a tanning reflector..... or on a real bad day, a good way to signal aircraft or give a shark something to chew on (maybe they love popping bubbles too?)!
 P.S. cooler in the pic is Mega-size with a 39" I.D. |
|
|

|
|
|
#12 | |
|
Senior Member
Join Date: Apr 2012
Location: Carlsbad Ca.
Posts: 1,206
|
Quote:
Good job and thanks for sharing.
__________________
[SIGPIC] |
|
|
|

|
|
|
#13 |
|
Junior
Join Date: Oct 2015
Posts: 26
|
IRON BUCKET!
Hey guys. I saw a guy with one of these but i couldn't find any DIY's so i decided to make one:
Need a place to store your irons?     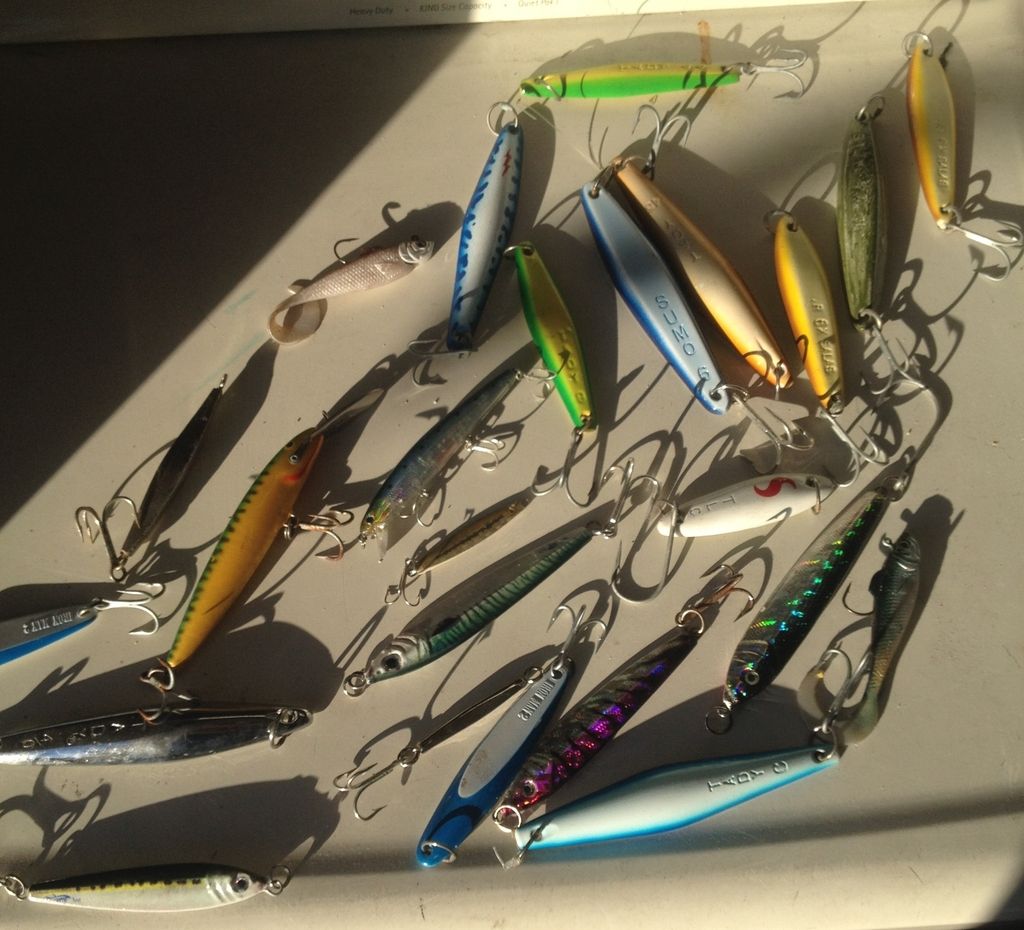 What you need: Bucket Bucket Lid Utility Knife Dremel tool Drill Bit Drill (You can use dremel tool as well) IRONS! Cut the inner circle off and the outer lip off with the utility knife! 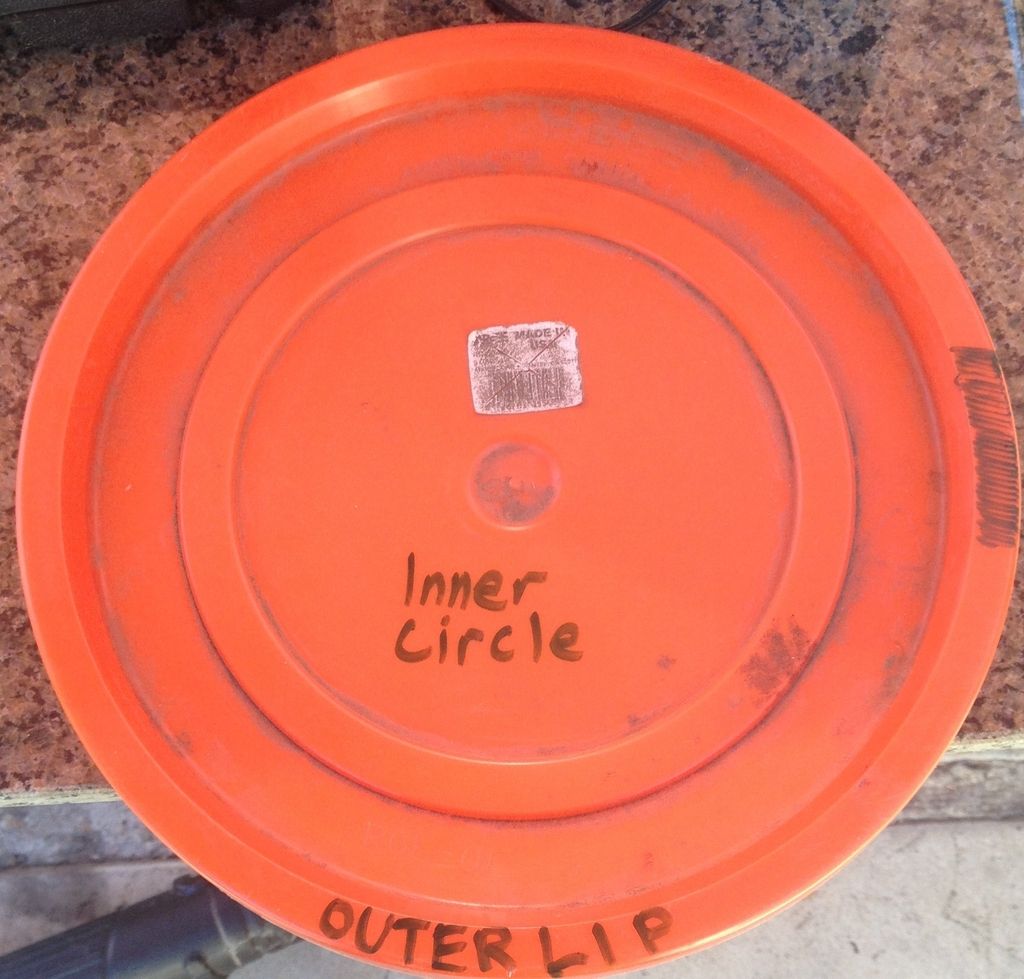 The outer lip wraps around the outside of the bucket (this is the part that has to go) and the inner lip stays inside the bucket (do not cut this off) 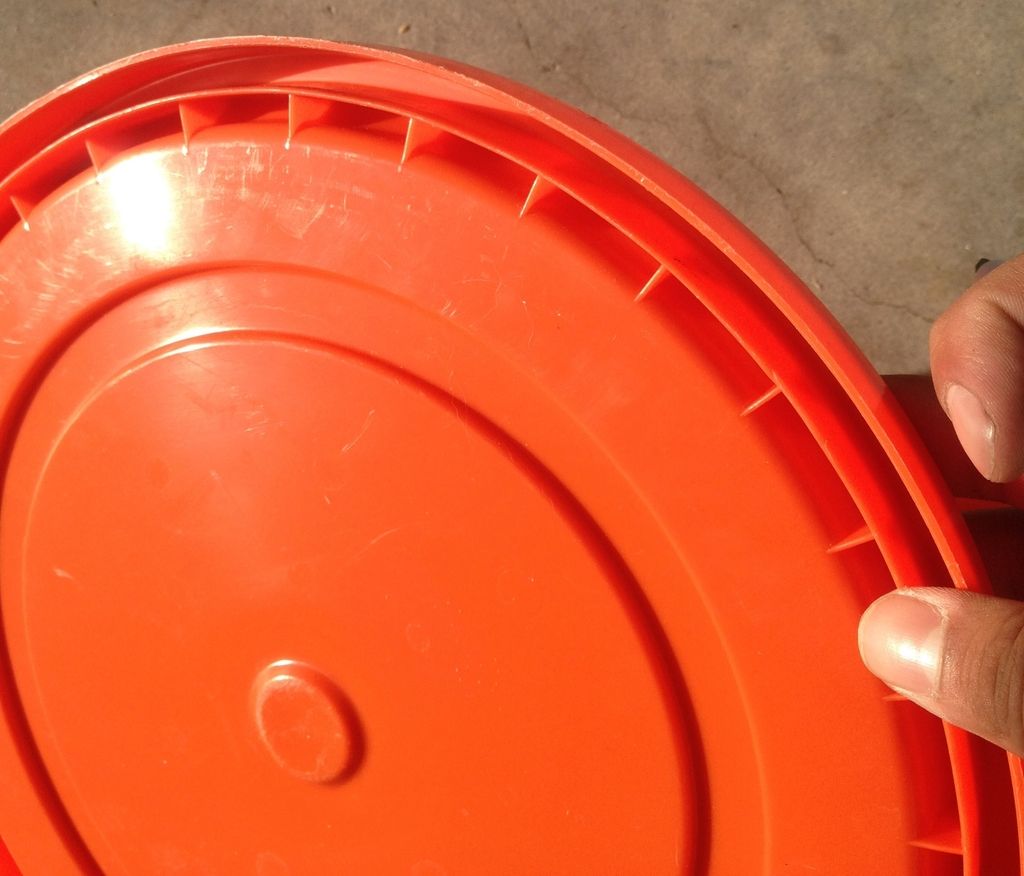 Smooth out lid with dremel 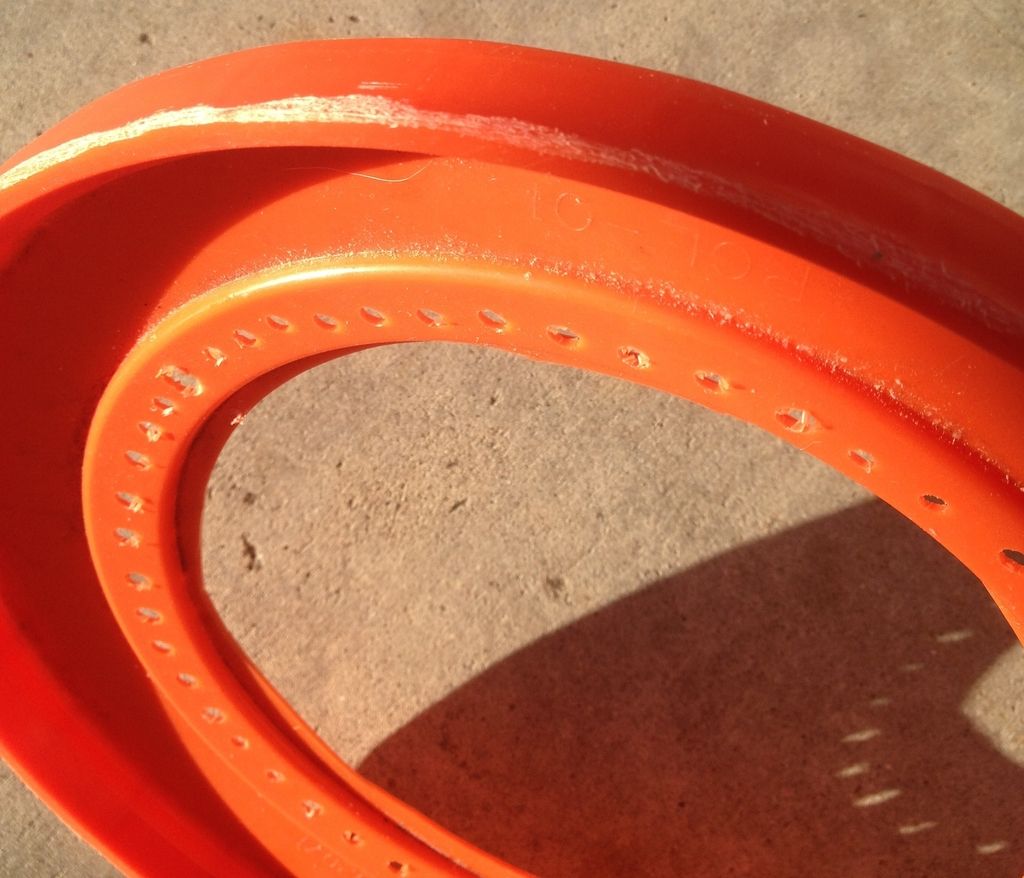 Slide lid down halfway and drill out holes 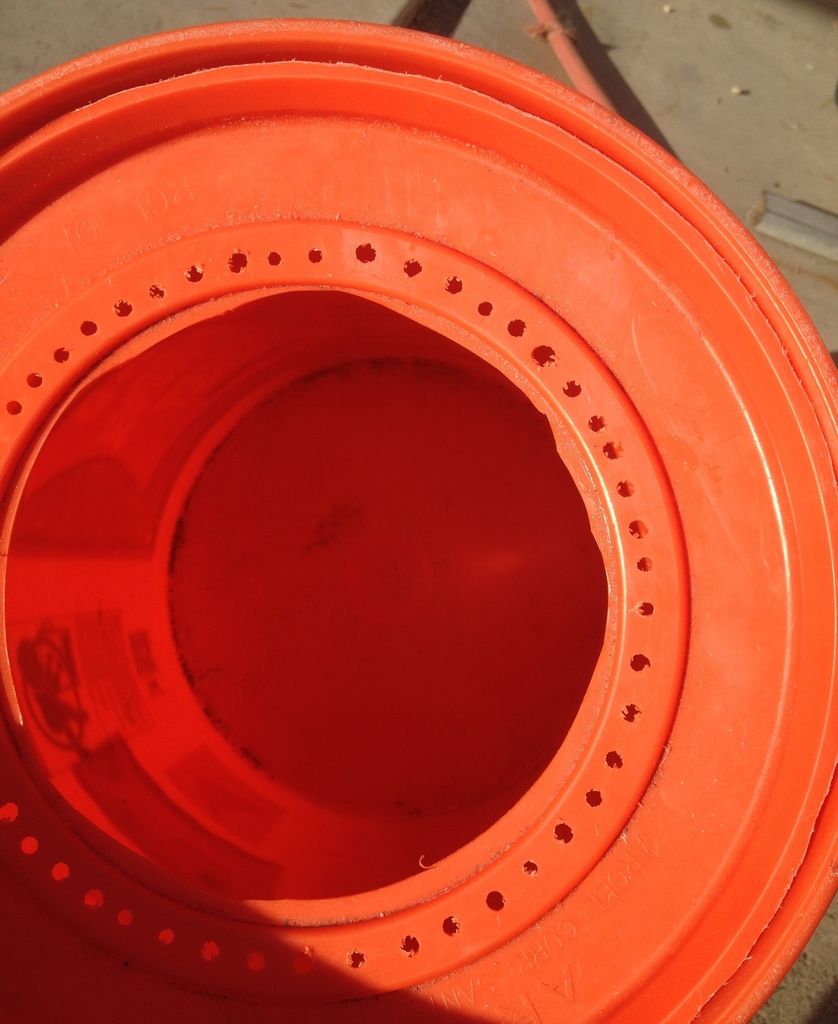 Now add your irons in and voila! You have a safe way of transporting and storing your irons. The lid sits tightly inside and does not require glue; you can remove the lid and use the bucket when needed. 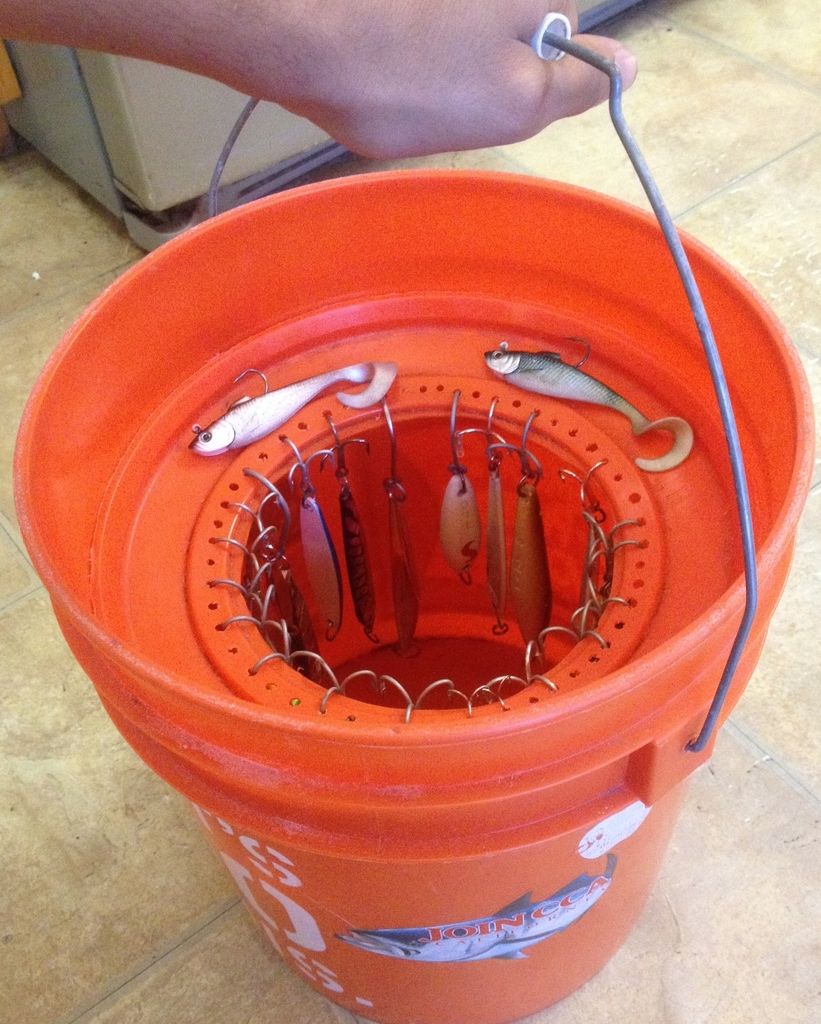 I drilled my holes out with my dremel tool so it came out looking pretty rough; I also did not bother smoothing out the inner circle. If you want yours looking better than mine, use a drill for the holes and smooth out the inner circle with dremel Last edited by Deez Knots!; 10-29-2015 at 11:28 AM. |
|
|

|
|
|
#14 |
|
Senior Member
Join Date: Jun 2016
Location: Escondido, CA
Posts: 130
|
Leaders/Rigs
I find myself changing out a rig from time to time while out there. What to do with those rigs and leaders? You certainly dont want the tangling up or getting snagged on other things - like your leg, feet, pedals... So, I simply spool them up on these. Its a nice way to keep them all arranged, undamaged, easily re-usable, and readily available.
https://www.amazon.com/gp/product/B0...?ie=UTF8&psc=1 |
|
|

|
|
|
#15 |
|
Junior
Join Date: Jan 2018
Posts: 3
|
We custom design and produce foam Kayak seat pad, foam Kayak seat cushion, kayak back band, Low MOQ and factory price! http://www.evacase.net
http://www.gogglecase.com http://www.goprocase.net http://www.watchcases.net |
|
|

|
|
|
#16 |
|
Junior
Join Date: Jan 2018
Posts: 3
|
|
|
|

|
|
|
#17 |
|
Junior
Join Date: Aug 2019
Location: Spain, Madrid
Posts: 11
|
Interesting) thanks
|
|
|

|
|
|
#18 |
|
Banned
Join Date: Oct 2019
Location: Italy, Roma
Posts: 10
|
thank you
|
|
|

|
|
|
#19 |
|
Junior
Join Date: Aug 2012
Posts: 6
|
|
|
|

|
 |
| Tags |
| kayak fishing inovations, kayak rigging ideas |
|
|