The Adventure/Islander seat is below the water line, so the seat plugs must be in place. When water comes over the side, which is frequent, you end up sitting in a pool of water. I found a video on YouTube (AI Seat Riser) that addressed this problem. He used 2-part foam (8 lb) to build up the seat area about 1.5" - 2". Since the water line is now below the seat, he replaced the seat drain plugs with 3/4" PVC pipes. Watch the
video if you are interested in making one.
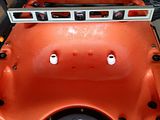
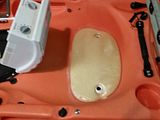

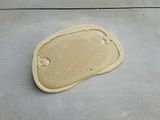


In my build, I used the check valves in place of the 3/4" pipes (see my previous post). The keys to remember are: 1) be sure kayak is level, 2) use a release agent on the seat, 3) work fast with the foam since it will set up within 3 - 4 minutes, 4) concrete needs to be rough in order to quickly shape the foam, 5) before painting, use acetone to remove any chemical residue from the foam. A coat of Polyurethane over the paint will make it more durable. Since the seat covers the drain holes, I added channels to the seat riser so the water will be able to drain.

Due to the seat being higher, the mounting position for the back rest was also raised. I removed the bungee screw-in plugs used for the paddle keepers and replaced them with the D-ring plugs. The backrest is more comfortable clipped here. Plus it is easier to enter and exit the kayak with the shorter straps. The last modification was to secure the paddle bungee. It is now using a part of the Islander (sail) rigging.
I tested it out on a snotty day on the bay. As was expected, a lot of water came over the side, however, it drained out just as it was designed. The only negative was the hardness of the seat. I'll have to go back to sitting on my kneeling pad. Since I no longer need it under my seat (to raise me up), I'll now use it on top of the seat.