Decided it was time to make a few modifications to have it fit my needs. Whether it gives you a few ideas or assists with a modification I hope it’s helpful.
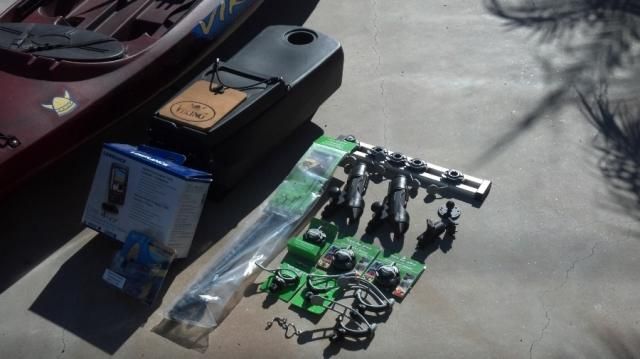
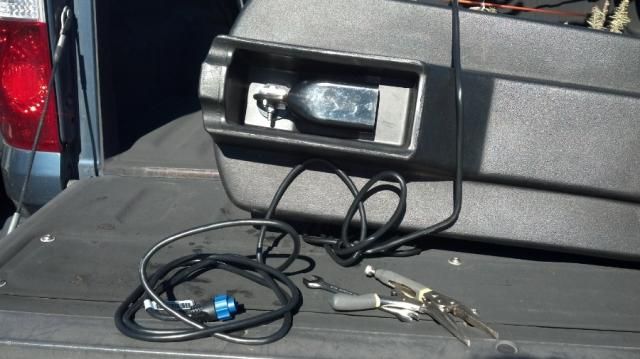
Started out with a few items in the modification of the tackle pod. However, by the time all was said and done... the few items grew beyond the items displayed in this pic.
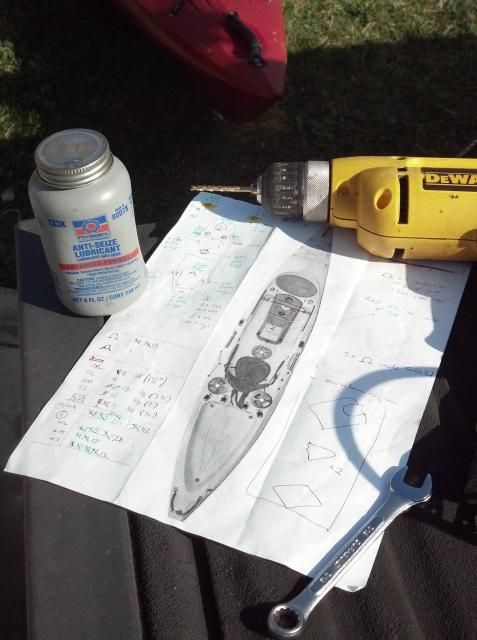
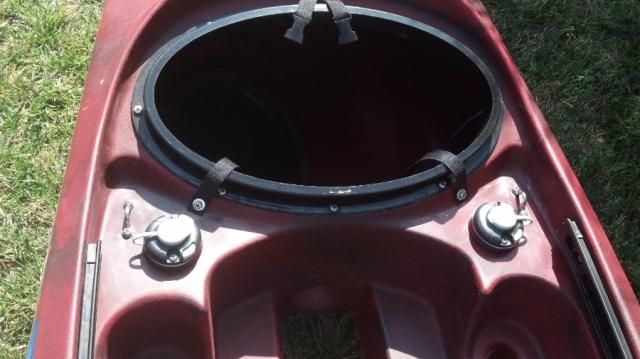
Here's my plan. Viewing how others had modified their Tackle Pod and choosing what I'd like to have on mine - I put it on paper, including an inventory of the necessary hardware. While seated in the kayak, I performed a dry mock up of the Tackle Pod w/ the desired modifications - this step allowed me to determine placement of modifications, ergonomics and whether or not a particular modification was practical and/or possible. What worked for one paddler may or may not work for another due to variables such as paddler's height, arm length, stroke length, etc.
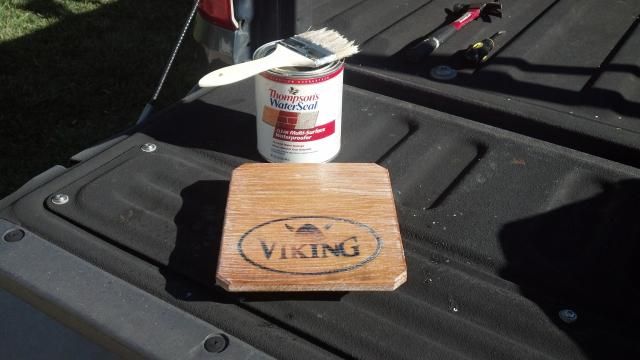
One of the first modifications completed was applying a water seal to the wooden cutting board - took a couple of weeks for this to cure.
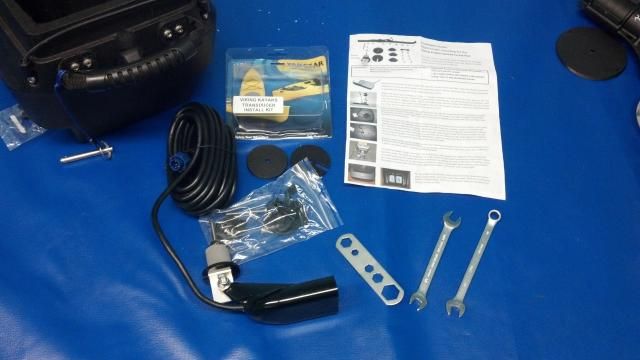
Transducer placement/installation was completed easily and quickly with the Viking Kayaks Transducer Installation Kit.
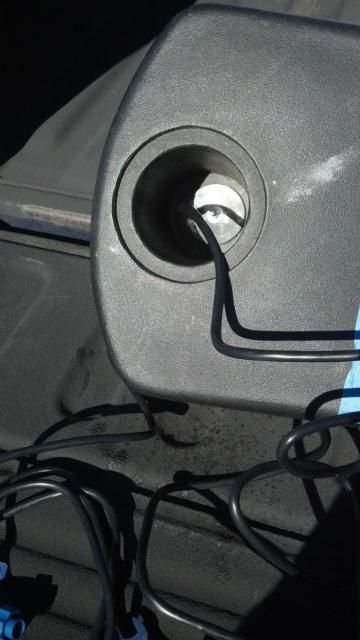
Bottom view of the Tackle Pod with the Lowrance transducer mounted. The transducer comes into direct contact w/ the water. It is housed far enough into the Tackle Pod and kayak that it is protected/will not encounter any snags nor hangups w/ kelp or rocks.
Top view of the Tackle Pod with the transducer mounted to the underside. Next step is to coil the cable into the cup holder and then secure the cap/cover with several self tapping screws.
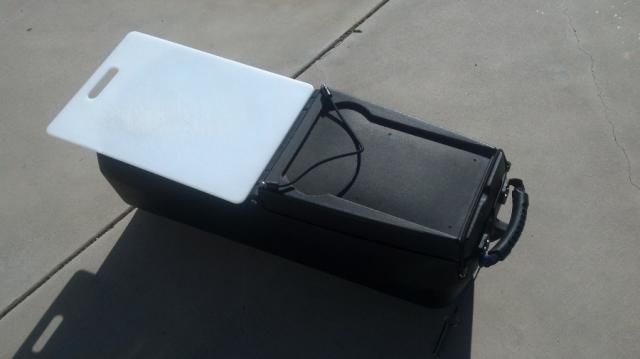
I've had screws/bolts/rivets pop out, especially in high stress areas of other kayaks I've owned. I decided to add a backing board to reinforce the modifications made since I'll be securing so much to the small topside of the Tackle Pod. I used a polypropylene/plastic cutting board as my backing board.
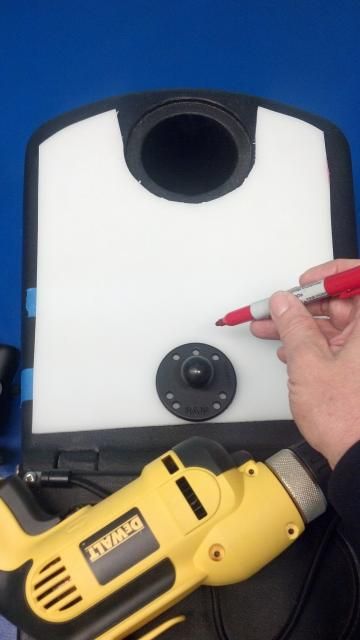
After templating, cutting and fitting the polypropylene/plastic cutting board to the inside of the Tackle Pod. I then placed it on the topside of the Tackle Pod (using the RAM Round Base with 1.0 Inch Ball) to determine where the first holes are to be drilled. The RAM base will secure the Lowrance display unit.
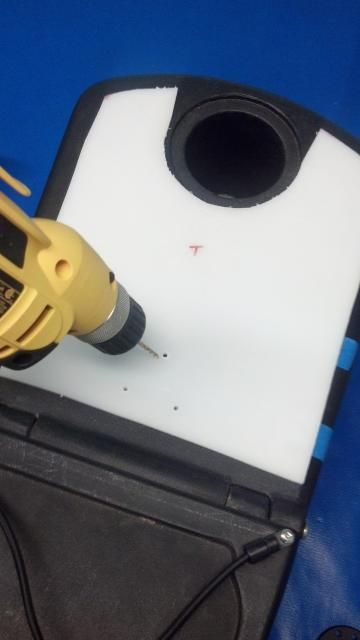
Drill bit should be a size smaller than the screw. This will insure a greater water tight fit. Stabilizing the polypropylene/plastic cutting board to the Tackle Pod, drill the first predetermined hole all the way through both the cutting board and Tackle Pod. Place screw through both the cutting board and Tackle Pod. This step repeated until all thee holes had been completed.
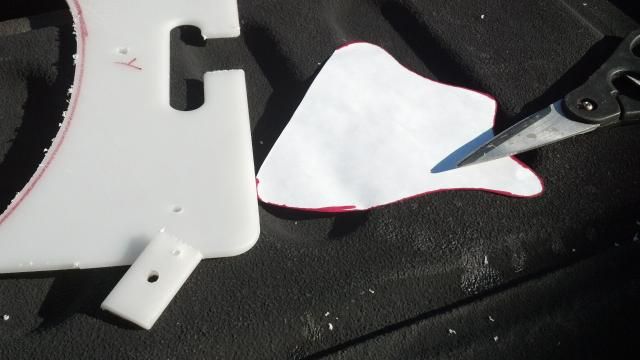
Paper stencil for creation of two more backing boards made from a polypropylene/plastic cutting board. This backing board will reinforce a Railblaza Starport and a pad eye near the large front hatch of the kayak.
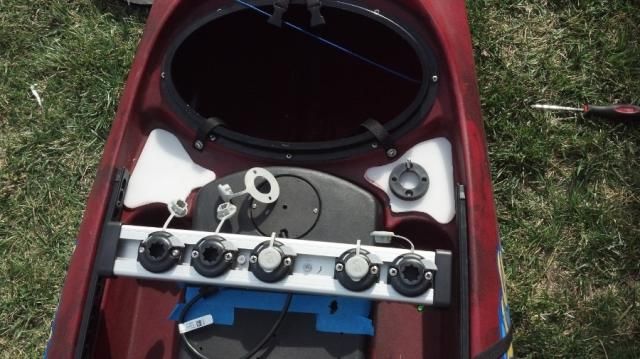
Same steps as the drill/hole placement of the backing board to the Tackle Pod - Drill bit should be a size smaller than the screw. Situate the backing board accordingly on the topside, then stabilize the polypropylene/plastic cutting board to the Viking Kayaks kayak, drill the first predetermined hole all the way through both the cutting board and kayak. Place screw through both the cutting board and kayak. This step repeated for the second hole to secure the Railblaza starport. Next determine the location of the pad eye, mark the hole w/ a sharpie, drill through both cutting board and kayak, place screw, and repeat for the last screw. Once this is done, remove cutting board from the topside of the kayak and place into hull to secure the starport and pad eye accordingly. If the screw can easily slip through the drilled holes of the kayak (holes are too big) then you'll want to dab the holes with a marine/water sealant (marine goop or 3M 5200 Marine Sealant) to prevent water from leaking into the hull.
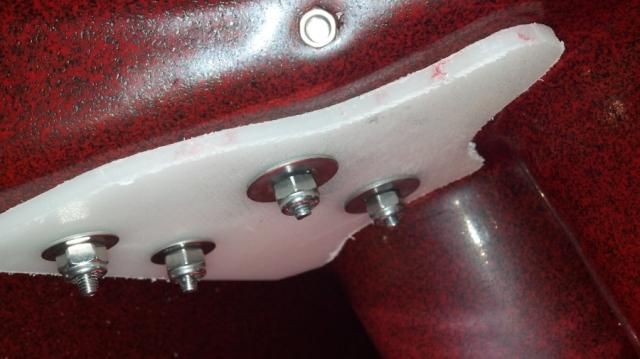
Inside the hull view of the backing board and hardware securing the starport and pad eye to the kayak. - I used a light application of an anti seize lubricant on all the screws in this project. The anti-seize is used to prevent corrosion, seizing, and stripping of screws/bolts during disassembly and reassembly.
Starports and pad eyes completed.
Will post more pics this week...